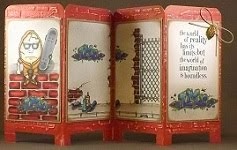
Using Copic markers to fill stamped images can result in wonderful, beautifully blended, very realistic-looking images. The qualities of the alcohol-based ink can produce enough moisture in your paper to allow additional light layers of darker shading colors and lighter highlight colors to blend smoothly.
Using Copic markers with the Copic airbrush system can result in fabulous layers of colors that can be used on other paper crafting projects too. The force of the air hitting the tip of the marker will disperse particles of ink into the air that fall gently onto the surface of your project.
I've created this layout using Bazzill Smooth White cardstock, white glossy coated QuicKutz self-adhesive chipboard, and a variety of white buttons.
To add some fun texture to an otherwise flat layout, I used a variety of stamps to create backgrounds on some of these layout elements. I inked the stamp using a Versamark Watermark Ink Pad and sprinkled Vippies Transcendence (clear) Embossing Powder over the stamped image. I used my heat tool to melt the embossing powder to a raised shiny image.
Stamp and heat emboss a grid, script and flourish in a few places, off of the edge of a 12x12 piece of cardstock. Stamp and heat emboss dots, mosaic, distressed background and filigree on smaller cardstock shapes.
Airbrush darker color at edges (RV19, V09 OR BG18) and a coordinating medium color toward center (RV14, V06, OR BG15).
Embossing Powder Resist - Dab or spritz Copic Colorless Blender Refill onto a soft paper towel or tissue and quickly swipe damp towel over embossed areas to remove color and expose melted embossing powder. If you move the damp towel slowly, more of the colorless blender will soak into spots of the colored area and fade or lighten that area. Allow your color to remain in tact by moving the damp towel quickly. You can always swipe the towel again to expose more of the embossed area but it'll be more difficult to add color if you over-fade or -lighten the colored area.
Please note that the heated embossing powder will remain shiny and raised and will not be "eaten" by Copic marker ink. (See Using Copics with Embossing Powder post here.)
Use glue dots to adhere buttons to a non-stick craft sheet. The glue dots will keep the buttons from blowing away with the force of the airbrush system. One quick coat of the darkest colors will work best over plastic buttons. Allow buttons to dry well before handling (approx. 5-10 mins). The buttons will transfer easily to your project since they're already adhered to glue dots.
This photo shows how Copic markers and the airbrush system can be a magnificent addition to your paper crafting projects, especially scrapbooking layouts. (Just click on the pic to see more details of embossed and colored areas.)
If you like what you see and/or have any questions about this project, just send a note and I'll get back to you.
Subscribe to:
Post Comments (Atom)


1 comment:
Great technique and what a great page and what a gorgeous little princess she is x
Post a Comment