Why Rosie's Book?

While growing up, I had a dear friend, Renee, that lived next door and with whom I spent much of my childhood. We grew, in different directions, and went on our merry way. Many years later, I ran into her parents and they kindly reminded me of the laughs they still have over my book. “What book?” I wondered with a puzzled look. "I don't remember a book." Hardy laughter accompanied their response. At some time during our childhood, I tried to convince Renee about something that her parents didn’t agree with. I told her that proof of its truth could be found “in my book.” Naturally she went home and tried to convince her parents of the same thing but they weren’t falling for it. She needed an edge and told them emphatically, “It’s in Rosie’s book!” After they caught their breaths from reborn laughter, they let me know how “Rosie’s book” has been cited for many other things throughout the years. They’ve also mentioned that they’d like to see “Rosie’s book” one day. I can’t remember all of the things that I said were in “my book” but I’m sure my dear friend’s parents can recall much more than I ever knew about – LOL!!! So, here it is . . . my version of things you might find In Rosie’s Book . . .

Sunday, June 17, 2012

Card Art with Copics: Crafts and Me Stamps Aia by Hannah Lynn

This fabulous butterfly fairy poses mid-flight, her mini butterfly friends fluttering around her, to share warm words with someone special. Her name is Aia and she has been designed by Hannah Lynn exclusively for Crafts and Me Stamps.  Aia is available as a rubberstamp (here).

I've used the "beyond the edge" technique with die cut ovals to shape my butterfly fairy.  Here's a closer view of my Copic-filled image . . . 


Adding coordinating handmade flowers to my projects makes me happy.  Punching shapes from my card scraps then layering them to form my flowers makes it so easy to do.  Here's a closer view of one of my handmade flower clusters where I've lightly painted each flower with Diamond Stickles for added sparkle.


I've layered Bazzill cardstock with Hot Off the Press (HOTP) Paper Pizazz Vintage Yellow Flowers patterned paper.   I've carried butterflies from my image onto my card by adding HOTP Pastel Butterflies Shaped Brads to each side of my image.  The loving sentiment is from a Just Rite Spring Words set.

Here's a view of my completed card front showcasing Hannah Lynn's Aia image . . .


I'm entering this card into the following challenges:
Fashionable Stamping Challenges "Nature" (here)
Craft Your Passion "Anything Goes" (here)
Hooked on Crafts "All that Glitters" (here)
Bunny Zoe's "Girls, Girls, Girls" (here)
Simon Says Stamp "Joy's Photo Inspiration" (here)
Divas by Design "Summer Theme" (here)
Truly Scrumptious "Flower Power" (here)
Cute Card Thursday "Punch Drunk" (here)
PaperCrafting Journey "Colour It Up" (here)
Stampin' for the Weekend "Bugs and Butterflies" (here)


Copics used:
skin - E000, E01, E11, E93
hair - RV91, RV93, RV95, RV99
outfit - BG93, BG96, BG99, Y21, Y26, Y28
airbrushed background - BG10


I'm so glad that you stopped by to visit!

~ Rose

Wednesday, June 13, 2012

Crafts and Me Stamps Challenge: Pearls and Roses

The Dynamite Digi design team over at the Crafts and Me Stamps' challenge blog wants to see Pearls and Roses added to your projects.  Crafts and Me Stamps is sponsoring this challenge and offering THREE digi images of the winner's choice to a randomly selected entry.  You can find out more about this challenge and sponsor here.

I've used a recently released digi image named Pearl Princess, designed by Hannah Lynn, exclusively for Crafts and Me Stamps.

Here's a closer view of my Copic-filled image . . .


I've layered Paper Adventures Island Lagoon Seashells with Bazzill cardstock.  A few golden metal prong shell and starfish charms add to my seashell theme.  A bit of Satin Sensations 5/8" Bridal White satin ribbon provides a center border and bow.  Zva Creative swirls of pearls provide the appearance of movement throughout.  Sweet Recollections Mulberry Paper Mini Roses in varied shades of orange are clustered with a bit of glimmer added from Petaloo Dazzlers Florettes.

Here's a closer view of my completed Birthday card front . . .


Here's a view of the inside where I've used a lovely Endless Creations "Birthday Love Peace" sentiment . . .


Here's a view of my completed easel card  showing how I've used the digital image called Pearl Princess by Hannah Lynn to share Birthday wishes . . .


You've just got to hop over to the Crafts and Me Challenge blog to see how the amazingly talented Dynamite Digi girls have showcased their use of Pearls and Roses on their projects!


I'm entering this card into the following challenges:
Sketch Saturday "Sketch by Susie" (here)
Crafty Creations "How Charming!" (here)
Divas by Design "Summer Theme" (here)
Truly Scrumptious "Flower Power" (here)
PaperCrafting Journey "Colour it Up" (here)
Crafty Catz  "Summer Time" (here)
Craft Your Passion "Anything Goes" (here)
Bunny Zoe's Crafts "Girls, Girls, Girls" (here)
Everybody Art "Roses" (here)


Copics used:
skin - E000, E01, E11, E93
hair - E31, E35, E47
top, pillow, coral - R11, R14, R17
tail, seaweed - BG70, BG72, BG75, BG78
crown, brush, mirror - Y13, Y26, Y28
shell - YR0000, YR02, YR04
goldfish - YR20, YR23, YR27
rocks - N6, N4, N1
sand - E40, E41, E43
Copic Opaque White painted pearls


"Top 3" June 20, 2012 Divas by Design


"Top Pick" June 21, 2012 Paper Crafting Journey


I'm so glad that you stopped by to visit!

~ Rose

Monday, June 11, 2012

Card Art with Copics: Crafty Secrets Car Classics

I think that old vehicle images make wonderful additions to cards for males of all ages.  It seems to me that most young boys are attracted to all types of vehicles at a very early age and that interest continues as they grow older.  I enjoyed working with my Copic colors while attempting to portray the reflective nature of metal in this larger image of an old car from the Crafty Secrets 2010 Car Classics large set.

This photo shows a closer view of my Copic-filled image.  I love how the characteristics of the Copic ink allow the reflective surfaces of metal to shine.


I debated whether it was appropriate to add any kind of flowers to a man card and decided that using metal from a set of Tim Holtz idea-ology Flowers, Leaves and Long Fasteners looked good without being too girly.  I also considered that it would be safe to replicate a floral wreath marking a race horse win so I adhered three small coordinating handmade accent daisies to a Tim Holtz idea-ology Sprocket Gear shaped like a steering wheel from an old vehicle.  Here's a closer view of my handmade paper flowers . . .


I layered older Paper Pizazz Hot Off the Press Masculine Sara Papers in stripe and paisley with Bazzill cardstock.  A border and bow made of 1/4" velour ribbon coordinates well.  I added a Tim Holtz idea-ology Adornments crown with a Charm Clip and Jumpring.  My Happy Father's Day sentiment is from a Close To My Heart Say It In Style set.

This photo shows my completed card front . . .


I'm entering this card into the following challenges:
One Stitch at a Time "For the Man in your Life" (here)
Dream Valley "For that Special Guy" (here)
One Stop Craft "Fathers Day" (here)
Secret Crafter "Happy Fathers Day" (here)
Delicious Doodles "For the Fellas" (here)
PaperCrafting Journey "Color it Up" (here)
Simon Says Stamp! "Diamond Jubilee, Crowns and/or Gems" (here)
Creative Inspirations "Card for a Male" (here)
Cards for Men "Father's Day" (here)
Sweet Stamps "For Dad" (here)


Copics used:
car body - B32, B34, B37, B39
chrome - C1, C3, C5
airbrushed background - B32, B34, B37, C5, C3, C1


I'm so glad that you stopped by to visit!

~ Rose

Thursday, June 7, 2012

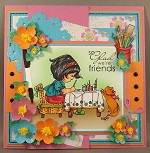
Card Art with Copics: Elisabeth Bell's Creative Genius

I'm thrilled to have made time for another round with this sweet digital image designed by Elisabeth Bell called Creative Genius.  I was very lucky to win her by participating in the Digi Bells' November 2011 new release blog hop (here). You can find her at the Elisabeth Bell Digital Gallery (here).

There's plenty of space to add a sentiment from an older Stampin' Up! Best Yet set.  Here's a closer view of my Copic-filled image . . .


I've added some patterned paper from a Prima The Sasha Paper Collection tablet.  The round element is diecut from a Spellbinders Shapeabilities Floral Doily Motifs set.  A few black mini brads add nice contrast to my bright papers.

I've used a medium and small blossom punch with a Punch Bunch mini sun and small cosmos to create my coordinating handmade flowers.  A light layer of Diamond Stickles painted over each adds beautiful glimmer.  Here's a closer view of one of my flower clusters . . .


I've included a few shaped supporting accents:  the pencil holder is a stamped image from Art Gone Wild!, the marker and scissors are QuicKutz die cuts.  This photo shows my completed card front where I've used the Creative Genius digital image designed by Elisabeth Bell . . .


You can find more inspiration for using Elisabeth Bell's digital images at the Digi Bells Design Team blog here.


I'm entering this card into the following challenges:
Elphine House Australia "Sketch by Janneke" (here)
Secret Crafter "Anything Goes" (here)
One Stitch at a Time "Use a Digi" (here)
Ooh La La Creations "Make it Girly" (here)
Papertake Weekly "Anything Goes" (here)
Digital Tuesday "Anything Goes" (here)
Oldie But Goodie "Anything Goes" (here) - Prima Sasha paper pad is from 2008-09
Truly Scrumptious "Flower Power" (here)
Tuesday Throwdown "Friendship" (here)

Copics used:
skin - E000, E01, E11, E93
hair - T9, T6, T0
chair - YR20, YR04, YR07
wood - E31, E35, E47
pants - RV23, RV14, RV19
slipper - YG11, YG13, YG17
shirt - BG13, BG15, BG18
cat - YR12, YR15, YR18
table cloth - E41, E40, 0
airbrushed background - E43, YG11


"Top 5" June 12, 2012 Tuesday Throwdown
 
I'm so glad that you stopped by to visit!

~ Rose

Monday, June 4, 2012

Card Art with Copics: Crafts and Me Yule Fairy

This lovely Yule Fairy, providing a guiding light and dressed in holiday colors, makes a sweet image for sending warm holiday wishes. She has been designed by Molly Harrison exclusively for Crafts and Me Stamps and is available as a rubberstamp (here).


I've added a lovely rounded sentiment from a Crafty Secrets Home Sweet Home large set.  This photo shows my Copic-filled image . . . 


It makes me happy to add coordinating handmade flowers, like these poinsettia clusters, to my projects.  Each flower is lightly painted with Diamond Stickles for added sparkle.  My flowers are formed by layering some punched paper flowers . . .


I've layered Bazzill cardstock with Bo Bunny's A Gift of Love St. Nick Sugar Plum and Holly Beary patterned paper. A Memory Box Holly Vine forms a border on the left side of my image.  A few gold mini brads help to carry a bit of gold from my image into my card.

Here's a view of my completed card front showcasing Molly Harrison's Yule Fairy image . . .


I'm entering this card into the following challenges:
Oldie but Goodie "Anything Goes" (here) - rubberstamp is 1 1/2 years old!
Simon Says Stamp! "Anything Goes" (here)
Divas by Design "Anything Goes" (here)
Winter Wonderland "Holly" (here)
Secret Crafter "Anything Goes" (here)
There's Magic in the Air "Three in a Row" (here) - Punches, Flowers, Circles


Copics used:
skin - E000, E01, E11, E93
hair - E31, E35, E47
skirt, ornament - R22, R29, R59
top, ornament - G82, G85, G99
wings - Y13, Y26, Y28
airbrushed background - Y13, R22, B93, B99


I'm so glad that you stopped by to visit!

~ Rose

Sunday, June 3, 2012

Simple Card Art with Die Cuts: Spellbinders Labels Six

I've continued in my attempts to meet the challenge that the Scrappers Cove proposed to me to create samples to show what can be done with the graduated, various shaped Spellbinders Labels dies.

This time I've used some of the soft designs and colors of My Mind's Eye Miss Caroline Collection's Lucky Tapestry, Story Plaid and You and Me Bloom patterned papers with coordinating Bazzill cardstock colors.  I left the card samples simple so students can enjoy adding their own embellishments and sentiments later.

Here's a pic that shows the several A2-sized cards I made using the Spellbinders Nestabilities Labels Six that we put together during my April Spellbinders Nestabilities - Let Us Count the Ways - Labels Six class at the Scrappers Cove in Milltown, NJ.

These cards emphasize adding layers and frames to side-open, tent, step and gatefold cards as well as shaping cards and more.  Spellbinders Labels Six has a fun oval element to it that can be enhanced with die cut ovals.


You can find examples of how I used the Spellbinders Labels One dies here, Labels Two here, Labels Three here, Labels Four here and Labels Five here.


I'm so glad that you stopped by to visit!

~ Rose