Why Rosie's Book?

While growing up, I had a dear friend, Renee, that lived next door and with whom I spent much of my childhood. We grew, in different directions, and went on our merry way. Many years later, I ran into her parents and they kindly reminded me of the laughs they still have over my book. “What book?” I wondered with a puzzled look. "I don't remember a book." Hardy laughter accompanied their response. At some time during our childhood, I tried to convince Renee about something that her parents didn’t agree with. I told her that proof of its truth could be found “in my book.” Naturally she went home and tried to convince her parents of the same thing but they weren’t falling for it. She needed an edge and told them emphatically, “It’s in Rosie’s book!” After they caught their breaths from reborn laughter, they let me know how “Rosie’s book” has been cited for many other things throughout the years. They’ve also mentioned that they’d like to see “Rosie’s book” one day. I can’t remember all of the things that I said were in “my book” but I’m sure my dear friend’s parents can recall much more than I ever knew about – LOL!!! So, here it is . . . my version of things you might find In Rosie’s Book . . .

Showing posts with label Crafts and Me. Show all posts

Tuesday, December 31, 2013

My 2013 Blog Year In Review

I spent some time reviewing my 2013 blog posts and sadly my blogging shows that my health has been poorly this year.  Unfortunately I was not able to meet many of my design team commitments.  I'm grateful to the design teams of Crafts and Me Stamps, the Digi Bells of Elisabeth Bell's Designs and the lovely ladybugs of Ladybug Crafts Ink who have been patient with me while I recover as they have allowed me to continue to participate on their teams whenever I can.  I am on the mend and expect to show more projects in 2014 as I enjoy being part of introducing more of their amazing images.

I began the year as a more-experienced blogger. I continue to be inspired by you uber-talented artists who show work that I've come to know and love.  Some of my favorite 2013 occasions and projects are included below.  Basic card art rocks and fancy folds and other projects are especially fun and exciting to see!  I still enjoy my classically-shabby style - LOL!!!

There are five individual cards shown below so I enter this post in Debby's My Favourite Five of 2013 for a chance to win her fabulous favorite things candy.  (You can click on each pic to link to the posts for more details.)

Enter until Jan. 11, 2014

In January, I enjoyed rockin' in the New Year with KennyK's ElenaK . . .

http://inrosiesbook.blogspot.com/2013/01/card-art-with-copics-kenny-ks-elenak.html


February shows my use of the lovely Martini Nikki and several of my coordinating handmade flowers that I really love to make . . .

http://inrosiesbook.blogspot.com/2013/02/card-art-with-copics-ladybug-crafts-ink.html


In March I was officially crowned as a Ladybug with a beautiful tiara - LOL!!!  This tag using Queen of Hearts seemed appropriate to celebrate.

http://inrosiesbook.blogspot.com/2013/03/tag-art-with-crafts-and-me-stamps-queen.html


I had way too much fun adding stamped seasonal scenery through the window of Window Seat Billie and paper-piecing drapes to coordinate . . . (winter, spring, summer, fall)


In May, I played around with Photoshop until I learned how to merge digital images.  This example shows Geraldine in Paris . . .

http://inrosiesbook.blogspot.com/2013/05/card-art-with-copics-crafts-and-me.html


I struggled through the Summer but was able to begin Christmas-time cards using this 'Twas the Night Before Christmas image . . .

http://inrosiesbook.blogspot.com/2013/07/elisabeth-bells-world-challenge.html


I was honored to accept a guest design team spot at Sweet Stampin' for the month of September then sadly I was unable to meet their needs for my final week.  I did however add my first "no lines technique" on a scenic side-step card . . .

http://inrosiesbook.blogspot.com/2013/09/elisabeth-bells-apple-berry-digi-bells.html


When MiC and LMM hosted their first Graffiti Party, I couldn't wait to challenge myself by using their urban images and created my first screen card . . .

http://inrosiesbook.blogspot.com/2013/10/mic-and-lmm-freebie-challenge-graffiti.html


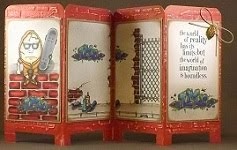
Finally in December, I got inky and messy and had a ton of fun working on this alcohol-inked, stamped, ornament-window tag . . .

http://inrosiesbook.blogspot.com/2013/12/tag-art-with-alcohol-inks-and-die-cuts.html


While I've been unwell, unmotivated and less than creative, it's been another wonderful year in papercrafting and blogging.

I am ever grateful for your kind words, encouragement and inspiration throughout 2013.

Here's wishing you a happy and healthy New Year that's overflowing with all good things!


As always, I'm so glad that you stopped by to visit!

~ Rose

Friday, October 4, 2013

Crafts and Me Stamps Challenge: Use a Hannah Lynn Image

The design team over at the Crafts and Me Stamps' challenge blog wants to see how you use Hannah Lynn images on your projects.  Hannah Lynn is sponsoring this challenge and a randomly selected entry will receive a wonderful signed 8x10 inch matte photo print direct from Hannah herself! You can find out more about this challenge and sponsor here.

I've used the newly released digital image named Payton by Hannah Lynn on a double gatefold card with a window.  Here's a closer view of my Copic-filled image.


Bazzill's light blue and green cardstock is layered with Imaginisce double-sided balloon/spots patterned paper to create my card.  My image is shaped to be seen through a window formed using a Lifestyle Crafts Large Circles die set.  A 5/8" Satin Sensations Island Blue ribbon bow provides an element to hang a vintage "sweet thing" charm from a Tim Holtz idea-ology Trinket Pin.
 
Here's a view of the front of my card when closed showing how I've used the Payton digital mermaid image . . .


This view shows my double gatefold card with windows on each side as it stands open and ready for display.


You've got to hop over to the Crafts and Me Stamps Challenge blog to see how the amazingly talented Design Team has shown their use of Crafts and Me Stamps Hannah Lynn images.


I'm entering this card into the following challenges:
Craft Your Passion "Add a Little Charm" (here)
Ooh La La Creations "F is for ____?" (here) - fancy folds, fantasy, fun, face, fin
Bunny Zoe's Crafts "Something Blue" (here)
Crafty Sentiments "Favorite Technique or Colors" (here) - Fancy Folds, Brights
Simon Says Stamp! "Going Dotty" (here) - Dots throughout background paper and on clothing
Fab 'n Funky "Ribbon" (here)
Moving Along with the Times "Anything Goes" (here)
Creative Craft "Anything Goes" (here)
Crafty Ribbons "Anything Goes with Ribbon" (here)
Crafty Catz "Anything Goes" (here)


Copics used:
skin - E000, E01, E11, E93, BV00
hair - E31, E35, E47
headband, top, fin - B21, B24, B26
leaves, tail, fin - G02, G05, G09
faux suede background - BG53


As always, I'm so glad that you stopped by to visit!

~ Rose

Saturday, September 7, 2013

Card Art with Copics: A Father's Love by Teresa Sherman

I'm so happy to participate in this week's Sweet Stampin' "Got the Blues" challenge as a guest designer.  It's such an honor to be invited to submit a project to be displayed along with the Sweet Stampin' team projects.  Many thanks to Tracey and the rest of the Sweet Stampin' design team for allowing me to participate in this challenge as a guest!  (You can find out more about this Cuddly Buddly AND The Ribbon Girl sponsored challenge and the wonderfully talented Sweet Stampin' design team here.)

Times have changed and young fathers are becoming more actively involved in the routine care of their newborns and the upbringing of their children.  My searches for an appropriate image portraying this change came up empty.

As my son was expecting a son of his own and I LOVE Teresa Sherman's loving mother images available at Crafts and Me Stamps and Delicious Doodles, I made a special request to have a loving father image created that I could use on a project for my son.  I was jumping up and down with joy when I received this fantastic image called A Father's Love by Teresa Sherman available at Crafts and Me Stamps here.

I'd like to extend a very special THANK YOU to Teresa for so creatively meeting my needs with this gorgeous image!

This photo shows my completed card front where I've used this fantastic new image.  Lifestyle Crafts Large Circles die cuts shape my image.  A Zig Pure Blue marker provides a border of faux stitching.  A Lifestyle Crafts Tag It Kit's tag is stamped with a "new baby" stamp that was part of a free clear stamp set accompanying a Cardmaking and Papercrafting magazine.  A silver baby rattle charm hangs from a piece of My Minds Eye Miss Caroline Dilly Dally Celebrate blue twine.


And here's the inside of my card showing more of Bazzill's warm gray and light turquoise cardstock layered with ADORNit Capri Taupe Sunshine and Sapphire Daisy patterned paper.  My all time favorite sentiment stamp to use on new baby cards is a rubber stamp from Rubber Cottage called "Every Child."


This view shows my easel card, open and ready for display . . .


Pop over to the Sweet Stampin' challenge blog for wonderful design team inspiration and enter your "Got the Blues" project to win some fabulous prizes.


I'm entering this card into the following challenges:
Cards for Men "Tag It" (here)
Creative Inspirations "Favorite Color Combo" (here)
Whimsy Stamps Monthly "Masculine Cards" (here)
Paper Crafting Journey "Anything Goes" (here)
Bunny Zoe's "BINGO" (here) - flowers, stitching, charm
ABC "U for Unlimited" = Anything Goes (here)
Fashionable Stamping "Sew 'n Sew" (here) - favorite sentiment stamp
Papirdokkene "Use a Stamp" (here)
Simon Says Stamp and Show "All Star Stamp" (here) - favorite baby card sentiment


Copics used:
skin - E000, E01, E11, E93, BV00
hair - E31, E35, E47
father shirt - B91, B93, B95
baby sleeper - BG10, BG11, BG23
airbrushed background - B91, speckles B99


As always, I'm so glad that you stopped by to visit!

~ Rose

Monday, July 15, 2013

Card Art with Copics: Elisabeth Bell's Christmas Hearth

These very excited yet curious children consider the magic of Santa's arrival while they investigate the fireplace where they've been told that Santa will appear.  You can find this wonderful clear stamp image designed by Elisabeth Bell for Belles 'n Whistles here.  Teresa at Crafts and Me Stamps is having a mahoosive sale of rubber and clear stamps so pop over there now to order yours!

Here's a closer view of my Copic-filled image.  The edge is framed using Marvy Uchida's Calligraphy Opaque Paint Gold Marker.


Four designs from Bo Bunny's Liberty Collection patterned paper are layered with Bazzill red, white and blue cardstock to form my easel card.  Three decorative metal brads accent the upper right corner as though Santa's sleigh, pulled by his magical reindeer will arrive soon.  Two handmade poinsettia flowers, made from Punch Bunch Kikyou and holly leaf punches, tie the sentiment to the image in the lower left corner.  An EK Success Paper Shaper Photo Corner Scallop punch, embossed with a QuicKutz' 2x2 Goosebumps HoHoHo metal embossing folder, accents one corner of my image and base sentiment.  A vertical sentiment from a Stamping Sensations Perfectly Said - Lori's Words stamp set lies alongside of my image.   

Here's a view of my completed card front showing my use of Elisabeth Bell's Christmas Hearth clear stamp image . . .


The base of the card includes a lovely stamped sentiment from Artful Legacy . . .


Here's a view of my easel card, open and ready for display . . .


You can find more inspiration using Elisabeth Bell's digital images at the Digi Bells Design Team blog here and many rubberstamp and clear stamp images at the Elisabeth Bell's World challenge blog here.


I'm entering this card into the following challenges:
Cards for Men "BINGO" (here) - Die/Punch Sentiment Multifold
Crafty Sentiments "Christmas In July" (here)
Fab 'n Funky "Christmas In July" (here)
Paper Crafting Journey "Christmas In July" (here)
Southern Girls "No Spoolin'" (here)
Delicious Doodles "All About the Scenery" (here)
Elphine House Australia "Add Some Metal" (here) - Decorative Metal Brads
Sassy Studio Designs "Christmas In July" (here)
Christmas Cards All Year 'Round "It's All About Santa" (here)
Dream Valley "Fancy Folds" (here)


Copics used:
skin - E000, E01, E11, E93, BV00
hair, logs, bear - E31, E35, E47
bricks, berries, apple - R22, R29, R59, W5
hearth, candlesticks, ornaments - C1, C3, C5
ornaments, flame glow - Y13, Y26, Y28
tree, pine - G82, G85, G99
boy sleeper, stocking - B21, B37, B39
girl sleeper , stocking - R11, R14, R27
mantel - E13, E17, E19
airbrushed background - E11, Y26

As always, I'm so glad that you stopped by to visit!

~ Rose

Wednesday, May 15, 2013

Crafts and Me Stamps Challenge: Use a Digi

The Dynamite Digi design team over at the Crafts and Me Stamps' challenge blog wants to see you use digital elements on your projects.  Marianne Designs is sponsoring this challenge and offering a wonderful goodie package of ribbon, dies and stamps to a randomly selected entry. You can find out more about this challenge and sponsor here.

I've used the newly released digital image named Golden Pond by Hannah Lynn to share get well wishes.  Here's a closer view of my Copic-filled image.  Diamond Stickles cover her top, hair flower, tail, rocks and some of the glistening grass.


Bazzill cardstock is layered with SEI Diane Garden Party glitter patterned paper to create my card.  My image is shaped to fit inside of a Spellbinders Nestabilities Majestic Elements Marvelous Squares diecut frame.  An Offray 1/4" purple ribbon provides a layered border and a triple bow.
 
A QuicKutz scalloped photo corner is accented with Close To My Heart Bitty Sparkles for a bit of bling.  A Close To My Heart Say It In Style sentiment fit perfectly along the base of my image.
 
Here's a view of the front of my card showing how I've used the Golden Pond digital image . . .


The inside of the card is left blank so I can include a handwritten personal note.


You've got to hop over to the Crafts and Me Stamps Challenge blog to see how the amazingly talented Dynamite Digi girls have shown their use of Crafts and Me Stamps digital images.


I'm entering this card into the following challenges:
Fab 'n Funky "Your Favorite Embellishment" (here) - ribbon
Cupcake Craft "Lots of Layers" (here)
Sweet Stamps "Spring" (here)
ABC "N for Not Just One" (here) - ribbon, diecut, rhinestones
Simon Says Stamp "Flower Power" (here) - gorgeous flower glitter background paper


Copics used:
skin - E000, E01, E11, E93, BV00
hair - E31, E35, E47
eyes, frog, grass - Y11, Y13, Y17
rocks - W1, W3, W5
eyes - C3, C1, 0
top, tail, hair flower - V91, V93, V95, V99
water - BG000, BG01
sky - B000


As always, I'm so glad that you stopped by to visit!

~ Rose

Sunday, May 5, 2013

Card Art with Copics: Crafts and Me Stamps Geraldine Meets Paris

I've recently merged two digital images using Adobe Photoshop Elements 8.0 and I liked the results so much that I decided to give it another try.  (You can find my first merged image post here along with the 8 simple steps for merging).


This time I merged Art Deco Geraldine digital stamp with Hannah Lynn's A Walk In Paris background digital image to send a special greeting.  Here's a closer view of my Copic-filled image.


Bazzill cardstock is layered with Graphic45's Secret Garden Collection Coming Up Roses double-sided patterned paper to create my card.  Faux stitching provides a contrasting border.  A Martha Stewart Punch Around the Page Daisy edge adds an open floral chain border along the top and bottom of my image.  Provo Craft Deckle Edge Paper Shapers decorative scissors add a torn paper look to a layer of matting around my image.
 
An EK Success Paper Shapers Scallop Photo Corner punch holds a few Studio112 Pearl Adhesive Gems.  An Offray 1/8" light orange ribbon bow accents my "Bonjour" stamped sentiment from an older Stampin' Up! Carte Postale set.
 
A few shades of orange Recollections Mulberry Paper Mini Roses lie above a Cheery Lynn Designs Mini Fanciful Flourish.  A Wrights' 3/4" white lace with pearls borders the right side of my image.
 
The inside of the card is left blank for me to write a personal note.
 
Here's a view of the front of my card showing how I've used my merged images . . .


I'm entering this card into the following challenges:
Simon Says Stamp! "Happy Mail!" (here)
Sweet Stampin' "Create a Scene" (here)
PaperCrafting Journey "Anything Goes" (here)
One Stop Craft "Flower Power" (here)
Totally Gorjuss "Anything Goes with Swirls" (here)
One Stitch at a Time "Anything Goes" (here)
Ooh La La Creations "Vintage/Nostalgic" (here)
Crafty Sentiments "The Letter B" (here) - bow, blooms, background, border, "Bonjour", bushes, blue


Copics used:
skin - E000, E01, E11, E93
gown - YR00, YR02, YR14
sidewalk - E41
lamp post, rail, curbs - W1, W3
building tops - C1, C3
Eiffel tower - YG91, YG93
stippled bushes - BG70, BG72, BG75
airbrushed sky - BG01; ground W2, W3, speckles E44


As always, I'm so glad that you stopped by to visit!

~ Rose

Wednesday, May 1, 2013

Crafts and Me Stamps Challenge: Floral Frenzy

The Dynamite Digi design team over at the Crafts and Me Stamps' challenge blog wants to see lots of flowers on your projects.  Crafts and Me Stamps is sponsoring this challenge and offering the winner's choice of THREE digital images to a randomly selected entry. You can find out more about this challenge and sponsor here.

I've used Adobe Photoshop Elements 8.0 (see 8 simple steps at the end of this post) to merge Lemon Shortbread's Butterfly Melody digital stamp with Hannah Lynn's Tulip Sunrise background digital image to share blooming wishes.  Here's a closer view of my Copic-filled image.


Bazzill cardstock is layered with Basic Grey June Bug Strawberry Cheesecake patterned paper to create my card.  My image is shaped with both Lifestyle Crafts Large Circles and Large Scalloped Circles.  A heart ribbon bow accents my "Bloom On!" Prickley Pear stamped sentiment.  Zva Creative red rhinestone swirls surround my sentiment with charming sparkle.
 
A Prima Strawberry Kisses large red flower and Laraine Pearl White large roses are lined with medium and small white roses that I've airbrushed with Copic R24, R39 and R89 to coordinate with my card.  Tattered Angels Glimmer Mist Iridescent Gold adds slight shimmer to my roses.
 
Here's a view of the front of my card showing how I've used my merged images . . .


The inside of the card includes a stamped Full Bloom sentiment from Impression Obsession.


You've got to hop over to the Crafts and Me Stamps Challenge blog to see how the amazingly talented Dynamite Digi girls have shown their use of flowers while using Crafts and Me Stamps digital images.


I'm entering this card into the following challenges:
Simon Says Stamp! "Happy Mail!" (here)
Sweet Stampin' "Anything but Birthday" (here)
Dream Valley "Things with Wings" (here)
Crafty Sentiments "The Letter B" (here) - butterflies, bow, bling, blooms, bare feet, bangles, background, brunette
A and T Emerald Faeries "Ribbons" (here)
A and T "Flowers" (here)
Creative Card Crew "Bling" (here)
ABC "M is for Make it Sparkle" (here)


Merging Digital Images using Adobe Photoshop Elements 8.0
1. Select File tab; then Open .jpg version of image (resize image now if needed)
2. Open .jpg version of background image
3. Select Magic Wand tool from left icons
4. Click in white areas surrounding image until you see dotted lines outlining image; Shift + Click in additional white areas if needed.
5. Select "Select" tab; then Inverse
6. Ctrl-C to copy image
7. Click on background then select Edit tab; then Paste
8. Save merged image with new .jpg name


Copics used:
skin - E000, E01, E11, E93, BV00
hair - E31, E35, E47
grass, stems, leaves - G82, G85, G99, YG11, YG13, YG17
smooth rocks - W1, W3, W5
rugged rocks, grounding stippled pebbles - C1, C3, C5, 0
mushrooms - E70, E71, E74
ladybug, pansies, tulips - R21, R24, R29
mossy areas - BG90, BG93, BG95, BG99
dress, butterflies - Y13, Y26, Y28
airbrushed clear sky - B21


As always, I'm so glad that you stopped by to visit!

~ Rose

Wednesday, April 17, 2013

Crafts and Me Stamps Challenge: Bling It Up!

The Dynamite Digi design team over at the Crafts and Me Stamps' challenge blog wants to see lots of bling on your projects.  Marianne Designs is sponsoring this challenge and offering two clear stamp sets, a die set AND two flower ribbons to a randomly selected entry. You can find out more about this challenge and sponsor here.

I've used a newly released Lady Leprechaun digital stamp by Hannah Lynn on a flip-twisted easel card to share lucky wishes.  Here's a closer view of my Copic-filled image.


This image is a good example of coloring through layers as the water is the first layer that you see through to find the items lying below.  After adding color to the images below the water, allow it to dry well, then add a thin layer of water color over everything.  The color of the items beneath may smear slightly and that adds to the natural effect of a bit of blur while viewing through the layer of water.
 
Bazzill cardstock is layered with Karen Foster Design Shamrocks single sided patterned paper to create my card.  My image is shaped with both Spellbinders Grand Nestabilities Grand Large Labels and Large Labels sets.  A sheer swirls ribbon provides a bow.
 
Here's a view of the front of my card showing how I've used Lady Leprechaun.  A Stampin' Up! Sincere Salutations sentiment lies in the lower corner with Recollections Mulberry Paper Roses clustered on one side and Zva's swirl rhinestones flowing from each side.


The base of the card includes a stamped sentiment from a Close To My Heart Pair-a-Phrase set with Little Yellow Bicycle Lucky Me green Jewel Stickers accenting the center of the phrase.  A Little Yellow Bicycle Lucky Me Chipboard Button sets in each corner.


Here's my flip-twisted easel card, open and ready for display . . .


You've got to hop over to the Crafts and Me Stamps Challenge blog to see how the amazingly talented Dynamite Digi girls have shown their use of bling while using Crafts and Me Stamps digital images.


I'm entering this card into the following challenges:
All Sorts "Letter of Your Name" (here) - R for rainbow, roses, rhinestones, ribbon
Divas by Design "Butterflies and Birds" (here) - butterfly in image
Ooh La La Creations "Easel Card" (here)
Papertake Weekly "One Paper Taker" (here)
Everybody Art "Bling" (here)
Sweet Stamps "A Rainbow of Color" (here)
Flutterby Wednesdays "Sentiment on Front" (here)


Copics used:
skin - E000, E01, E11, E93, BV00
hair - E31, E35, E47
pot of gold and coins - Y13, Y26, Y28
crab - R22, R29, R59
fish - RV23, RV14, RV19
eyes, bushes - stippled with YG11, YG13, YG17, 0
top, ruffle, hairtie - BV02, BV04, BV08
snails - E70, E71, E74
shamrocks - G82, G85, G99
sand - E40, E41, E42, E44 stippled
tail, fin - BG11, BG15, BG18
mountains - C00, C1, C3
sky - B000
water - BG000


As always, I'm so glad that you stopped by to visit!

~ Rose

Wednesday, April 3, 2013

Crafts and Me Stamps Challenge: Spring Flowers

The Dynamite Digi design team over at the Crafts and Me Stamps' challenge blog wants to see spring flowers on your projects.  Crafts and Me Stamps is sponsoring this challenge and offering a wonderful prize of a set of newly released vintage/shabby chic digital paper pads to a randomly selected entry. You can find out more about this challenge here.

I've used Easter Lily Fairy digital stamp by Hannah Lynn on a side open card to share spring wishes.  Here's a closer view of my Copic-filled image.  Super sparkly Yellow and Star Dust Stickles are lightly painted over stamen, petals and butterfly.


I've created handmade gerber daisies and accent daisies using Punch Bunch large oak leaves, large, medium and small daisies, small and mini suns, medium dusty miller leaves and small birch leaves punches.  Star Dust Stickles is lightly painted over flowers for beautiful sparkle.


Bazzill cardstock is layered with K&Company Smitten Butterflies flat single sided paper to create my card.  A Satin Sensations 5/8" Saffron satin ribbon provides a border and bow.  A self-curling ribbon wraps around my image base.  A stamped  sentiment set from a Kraftin' Kimmie Yvette set is placed at the top and bottom of my card front.
 
Here's a view of the front of my card showing how I've used Easter Lily Fairy.


The inside of the card is left blank for a handwritten note.


You've got to hop over to the Crafts and Me Stamps Challenge blog to see how the amazingly talented Dynamite Digi girls have shown their use spring flowers while using Crafts and Me Stamps digital images.


I'm entering this card into the following challenges:
Crafty Creations "Flowers and/or Fairies" (here)
Divas by Design "Spring Colours" (here)
Sweet & Sassy Digi "Think Spring" (here)
Sweet Stampin' "Oh So Girly" (here)
One Stitch at a Time "Spring" (here)
Papertake Weekly "Anything Goes" (here)
Simon Says Stamp and Show "Absolutely Anything Goes" (here)
Flutterby Wednesdays "Flowers" (here)


Copics used:
skin - E000, E01, E11, E93, BV00
hair - E31, E35, E47
leaves - YG11, YG13, YG25
lilies - Y21, Y23, Y26
wings - BV000, BV01, BV04
airbrushed background - Y21, YG11, YG13, BV01, BV04


As always, I'm so glad that you stopped by to visit!

~ Rose

Sunday, March 24, 2013

Card Art with Copics: Crafts and Me Stamps Daffodil Springs

Crafts and Me Stamps carries a wonderful selection of amazing digital and rubber stamps that are perfect for sharing springtime and Easter wishes.

I've used this beautiful digital mermaid surrounded by gorgeous blooming daffodils named Daffodil Springs by Hannah Lynn on an Easter card.  You can get your own digital Daffodil Springs here.

Here's a closer view of my Copic-filled image.  I've added Stardust Stickles over the daffodil petals and the butterfly in her hair.


I've layered Bazzill cardstock with Best Creation's A Walk in the Garden glitter paper.  A QuicKutz revolution scalloped corner, embossed with a QuicKutz revolution zebra goosebumps embossing folder, is popped up over the top corner of my image.  A Close To My Heart Say It In Style "Happy Easter" sentiment is popped up at the base of my image.  A Satin Sensations 5/8" Fuchsia ribbon bow lies near my sentiment.  Close To My Heart Bitty Sparkles are scattered throughout a Marianne Designs Creatables Branch Garden die that I've altered slightly to fit.
 
This photo shows the front of my twisted easel card, displaying Crafts and Me Stamps Daffodil Springs digital image . . .


The inside base is decorated to coordinate with the front.  I've added a stamped sentiment from a Stampin' Up! Miracle of Spring set.  Another Marianne Designs Creatables Branch Garden die cut, sprinkled with Bitty Sparkles lies around my sentiment.


Here's a view of my completed twisted easel card open and ready for display . . .


I'm entering this twisted easel card into the following challenges:
Simon Says Stamp! "Easter/Spring" (here)
Sweet Stampin' "Lots of Layers" (here)
Daisy Doodles "Easter" (here)
Papertake Weekly "Easter Treats" (here)
Digital Tuesday "Easter" (here)
Oldie but Goodie "Easter" (here)
Marianne's Design Divas "Get Inspired by Gardens" (here)
Crafts Catz "Sparkle with a Bow" (here)
Cute Card Thursday "Easter Parade" (here)
Charisma Cardz "Die Cuts" (here)


Copics used:
skin - E000, E01, E11, E93, BV00
hair - E31, E35, E47
leaves - YG11, YG13, YG25
mermaid top and tail - R81, R83, R85, R89
daffodils - Y21, Y23, Y26
airbrushed background - Y21, YG11, YG13


As always, I'm so glad that you stopped by to visit!

~ Rose
Wednesday, March 20, 2013

Crafts and Me Stamps Challenge: Buttons and Bows (Use Both)

The Dynamite Digi design team over at the Crafts and Me Stamps' challenge blog wants to see you use BOTH buttons and bows on your projects.  Marianne Designs is sponsoring this challenge and offering a wonderful prize of a die and clear stamp to a randomly selected entry. You can find out more about this challenge here.

I've used Little Miss Deelish digital stamp by Hannah Lynn on an easel card to share birthday wishes.  Here's a closer view of my Copic-filled image.  It wasn't until I was adding color to this sweet unicorn that I discovered all of the candy treats tied to his backside, head and legs.  He's covered in gummy bears, lollipops, ice cream cones, candy canes, and wrapped mints.  Who'dathunkit?!?!?!  Now I understand where the Deelish comes from.  LOL!!!  I tried to draw attention to the candy pieces by adding Lavender, Yellow, and Xmas Red Stickles to the candies.  The unicorn's horn, mane and tail are covered with Stardust Stickles.  Magenta, Firefly and Yellow Stickles covers the butterfly and fairy wing.


I've stamped gummy bear and wrapped mint images from a Stampin' Up! All Wrapped Up Accessories set, a lollipop from a SU! Very Punny set and an ice cream cone from a See D's Recipes set.  I added a bit of Copic color to my stamped candies then ran them through my Xyron "X."  I turned the strip over and ran them through my Xyron "X" again to have the stickiness on the top of my candy then covered them with Transparent Crystal Glitter Ritz for fun glimmer and shine.


Bazzill cardstock is layered with Doodlebug Designs Baby Girl Baby's Breath and Basic Grey Romani Archangel patterns to create my easel card.  A Lifestyle Crafts Large Circles die provides my circular element.  Faux stitching with a Zig pure brown marker borders my layers.  A Satin Sensations 5/8" Citrus satin ribbon provides a border and bow.  A stamped birthday sentiment from a Close To My Heart Just a Number set is lined at the top of my card front.  A few Memory Box pistachio green jewel stickers are lined around my image and sentiment.  Recollections mini roses with a medium bright green paper rose are clustered at a bottom corner.  A few white flower buttons are tied with My Mind's Eye Miss Caroline Dolled Up "Cute" Twine.
 
Here's a view of the front of my card showing how I've used Little Miss Deelish.


The inside of the card is designed similar to the front and includes a May You Touch stamped sentiment from Rubber Cottage.


Here's a view of my easel card, open and ready for display . . .


You've got to hop over to the Crafts and Me Stamps Challenge blog to see how the amazingly talented Dynamite Digi girls have shown their use of BOTH buttons and bows while using Crafts and Me Stamps digital images.


I'm entering this card into the following challenges:
Simon Says Stamp "Sketch by Dawny P 1 of 2" (here)
Cute Card Thursday "Anything Goes" (here)
Totally Paper Crafts "Easel Cards" (here)
One Stop Craft "Anything Goes" (here)
All Sorts "As Easy As 1, 2, 3" (here) - 1 image, 2 papers, 3 flowers
Cupcake Crafts "Mythical Creatures" (here)
Craft Your Passion "Ribbons or Lace" (here)
Creative Craft "For the Kids" (here)


Copics used:
skin - E000, E01, E11, E93, BV00
hair, shoes - E31, E35, E47
unicorn mane and tail, clothing - YG11, YG13, YG25
bows, clothing - R81, R83, R85, R89
hooves - W1, W3, W5
dress - Y21, Y23, Y26
unicorn body - E50, E53, E55
airbrushed background - Y21, R81, R85


As always, I'm so glad that you stopped by to visit!

~ Rose

Monday, March 11, 2013

Tag Art with Crafts and Me Stamps Queen of Hearts

It's been a while since I've spent some time gettin' inky and I've had alot of fun working on this tag with distressed and inked edges.

I've used Queen of Hearts digital stamp by Hannah Lynn on a standing tag.  I printed the image onto Bazzill Smooth white cardstock then die cut it using a Sizzix Tim Holtz Alterations Tag and Bookplates Bigz L die.  Here's a closer view of my Copic-filled image.


I reduced then printed my colored image and used Ranger's matt glossy accents to adhere it to a Tim Holtz idea-ology rectangle facet.  This wonderful embellishment hangs from a jump ring with a Tim Holtz idea-ology Bauble at the loop of a Tim Holtz idea-ology Trinket Pin through a studded black grosgrain 3/8" Michael's ribbon tied through my tag's top.


I placed a mask over my colored image then using a non-stick kraft sheet, I inked the edges of my white tag with Ranger's Distress inks in Wild Honey, Tumbled Glass, Stormy Sky and Frayed Burlap.  When dry, I began to stamp Alice in Wonderland-themed words from a Crafty Secrets Tea with Alice large stamp set.
 
Here's a view of the front of my tag showing how I've used Queen of Hearts.  A Prickley Pear stamped Queen for a Day sentiment is popped up over the base of my image.  A Creative Impressions Bits of Bling white mini pearl sets on her ring finger while a strip of Kaiser Craft white pearls are lined up at the left side.  A Sizzix Tim Holtz Alterations ATC & Corners die cut provides the black cardstock photo corners surrounding my image.


I adhered my tag to another die cut tag to cover the Copic bleed and messy ink.  The back of the tag includes a Tim Holtz Alterations Small Easel die cut to allow my tag to stand for display.


I'm entering this tag into the following challenges:
A and T Digital Designs "Hearts" (here)
Simon Says Stamp and Show "Chic to be Shabby" (here)
Tuesday Alchemy "Photo Inspiration - travel with rainbow" (here)
Creative Card Crew "Ribbon" (here)
PaperCrafting Journey "Anything but a Card" (here)
Craft Us Crazy "Anything Goes" (here)
One Stitch at a Time "Anything Goes/Use a Digi" (here)
Stamptacular Sunday "To Die For!" (here)
Whimsy Stamps "Use Metal" (here)


Copics used:
skin - E000, E01, E11, E93, BV00
hearts, hairbow, robe - E93, E95, E97, E99
hair - C1, C3, C5, BG13
scepter, crown - Y13, Y26, Y28
eyes, corset, top of scepter - BG11, BG13, BG15, BG18
white gloves, collar, sleeves - W1, W3, W5
Copic Opaque White acrylic paint highlights throughout


As always, I'm so glad that you stopped by to visit!

~ Rose