The thought of making birthday cards conjures up visions of images with cakes and candles. There are as many of those kind of fabulous images as there are individuals celebrating their birthday. Still, somehow none of the images that I have seemed suitable this time.
I wanted to make a birthday card for a very special "over 50" guy. No need for cakes and candles. Something more complimentary or encouraging seems better to me.
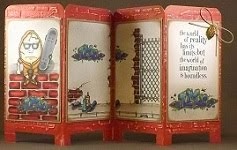
I inked up my Sugar Nellie Red the fox stamp and filled it with Copic colors.
I used QuicKutz cookie cutter tags to add a computer-generated sentiment. The little chick is from the Layers of Color Rise & Shine set.
A stamped chicken wire background, also from the Layers of Color Rise & Shine set, a few Punch Bunch grape leaves, and a border of ribbon complete my foxy birthday card.
The sly grin on the face of the recipient was worth a million bucks to me and confirmed that he's seen enough cakes and candles.
Copics used:
fox - YR12, YR15, YR18, E50, E53, E55, T0, T6, T9
chick - Y13, Y15, Y19
Monday, June 27, 2011
Sunday, June 19, 2011
Card Art with Copics: Sweet Pea Stamps Dance of Butterfly
The Dynamite Digi team at Crafts and Me wants to be dazzled by your bling. The lovely Teresa of Crafts and Me Stamps is offering SIX digi images to the winner of a randomly selected entry. Find out more about this challenge here.
The design team at "In A Sweet Pea Dream" wants to see how lacy you can get. They're offering a 5 piece unmounted stamp grab bag from the Sweet Pea Stamps store. Find out more about this challenge here.
The team at SweetPeaStampers wants to see your Summer swirls. The Crafty Purple Frog is offering three digital decoupage sheets to a randomly selected entry. Find out more about this challenge and their sponsor here.
This photo shows my Copic filled Sweet Pea Stamps Dance of Butterfly by Ching-Chou Kuik.
I've added a lace border to the top and a bit of knotted lace to the bottom. Basic Grey's designer rhinestones bling it in gold toned swirls adds to the swirls found in the Creative Imaginations Teri Martin Feel the Rhythm patterned paper. A simple netted and wired butterfly sports a little marquis shaped rhinestone as its body. I used this light cluster of embellishments to enhance my focal point image.
This photo shows the completed card front and my entry into the above-mentioned challenges.
You can find my Copic Fluorescent filled Sweet Pea Stamps Dance of Butterfly image here.
Copics used:
skin - E00, E11, E02, E93
hair - E31, E35, E47
tail, top - BG01, BG05, BG09
butterflies - BV00, BV02, BV04,Y00, Y02, Y06, YR00, YR04, YR07
moon - Y00, Y02, Y06
background - C1, C3, C5
Wednesday, June 15, 2011
Copic Creations Challenge: Doodling with Copics
The Copic goddesses at the Copic Creations Challenge blog want to see YOUR doodled art! Penny Black stamps is sponsoring this challenge and offering special prize packages to FIVE randomly selected entries. Find out more about this challenge and sponsor here.
The brush tips of Copic markers are very flexible and strong. Don't be afraid to press that tip to your paper and bend that baby right in half to smoosh some of that juicy ink onto your project. Your brush tips will spring right back into shape! You can place those round or tear drop shapes to form flowers, stars, leaves, insects, fish, and more, then when that color is dry, outline your shapes with the Copic Multiliner to define your shape's edge. You can use marker colors to coordinate with your papers too! It's an awesome way to expand the use of your Copic markers.
Here I've had to bend the brush tip of my markers while pressing them to my paper so that the pointy end is to the outside of my shape, while the rounded end overlaps in the middle. Five pointy ends to each shape and I've begun my star-shaped border. (I first used a pencil to lightly trace the size of my main image's square to provide a guide for placement of my stars.)
When that ink was dry, I used my Copic Multiliner SP 0.1 to outline my star shapes to define the edges. Because the Copic Multiliners are made of archival ink, the Multiliner ink won't feather when using the Colorless Blender to erase those spots where color remained outside of my added multiliner lines. Yay!
For a finishing touch of my whimsical star-shaped border, I used my Copic Multiliner to add some scrolls between my stars. When all the ink was dry, I applied atyou Spica Clear over each star for some amazing sparkle. Then, I erased that pencil line.
This photo shows my Penny Black Mimi Amongst the Stars image placed on top of my Copic Doodled Star Border Frame. Diamond Stickles covers the large star that Mimi is holding onto.
I chose my Copic colors to coordinate with the striped side of Best Creation's Birthday Stars double-sided glitter paper that I layered over my Bazzill brown cardstock. A star charm from the My Mind's Eye Stella and Rose Bits and Pieces Hattie "Happy" collection is attached with a Tim Holtz charm clip. A few Creative Impressions White Glimmer Round Fasteners adorn one corner. A Penny Black sentiment accents this Mimi image nicely.
This photo shows the completed card front showcasing my Copic Doodled Border Frame with Penny Black stamps.
You have until June 30th to enter your Copic Doodled Art to the Copic Creations Challenge Blog. Let's see what doodled shapes you can create!!!
Copics used:
skin - E000, E00, YR00, R20
hair - E31, E35, E47
wings - RV000, 0
dress - YG21, YG23, YG25
stockings - RV93, RV95, RV99
big star - B32, B37, B39
little stars, Doodled Border Frame - YG23, E59, B32, RV93, atyou Spica Clear
Monday, June 13, 2011
Zentangle: Ideas Worth Spreading
I was thrilled to accept an invitation to participate in a TEDx program early this month at the Princeton Public Library as a guest instructor to share the art of Zentangle. In the spirit of ideas worth spreading, the Princeton Public Library organized a cornerstone TEDx (Technology, Entertainment, Design) event to bring people together to share a TED-like experience. As Zentangle is a meditative art form, the library's TEDx event team recognized how incorporating Zentangle into their program would further enhance their ideas worth spreading theme.
I am pleased to share this photo showcasing the Zentangles created by my workshop's participants, many whom had never heard of or tried to tangle this way before.
As there is no right side up or upside down to a Zentangle, these Zentangle tiles look magnificent no matter which way they're positioned . . .
The rest of the evening was full of fabulous motivational speakers and performances. If you're lucky enough to have an organized TEDx event in your area, I'd strongly encourage you to attend. You won't be disappointed.
Thursday, June 9, 2011
Card Art with Copics: Crafts and Me Truth
The latest rubbah team challenge at the Crafts and Me Challenges blog is to "stamp something." Crafts 4 You is offering three sets of digi images as a prize to a randomly selected entry. Find out more about this challenge and their sponsor here.
I'm happy to share the second of two new digi images that I won for commenting during a recent Crafts and Me blog hop. Find the first image, Forest Friend, here.
This beautiful Sara Burrier image is named Truth. Blue is the color of truth, serenity and harmony, by helping to soothe the mind. I've filled my image using Copic blue-greens.
A few Bazzill Basics walnut jewels accent the stamped sentiment from Stampin' Up!'s 2008 Notes for You stamp from the Country Living Notes Kit.
I formed my gatefold card using My Minds Eye 2007 Tres Jolie Bonjour "Boy" Polka Dot/Turquoise Papier. A Sizzlits vintage photo corner adorns one corner of my image.
This photo shows the complete card front and my entry into the current Crafts and Me "stamp something" challenge.
When printing this digi image, I sized it to print at about 3 1/2" tall. She's really quite stunning and will likely be a joy to fill with color even at a much larger size. Being able to resize an image is a definite perk to using digi images.
Copics used:
skin - E000, E01, E11, E93, BV00
hair - E31, E35, E47
moon/chain/scarf - Y13, Y26, Y28
cross - R37
wings - C5, C3, C1, BV000, V000, Y000
gown - BG70, BG72, BG78
airbrushed E43, E41 (moon BG11)
Labels:
cards,
Copic Airbrush,
Copics,
Crafts and Me,
My Minds Eye,
Sizzix
Sunday, June 5, 2011
Card Art with Copics: Crafts and Me Forest Friend
The Crafts and Me digi design team wants to see your punch art. The Crafty Purple Frog is sponsoring this challenge and offering three digi decoupage sheets of Ching-Chou Kuik's fantasy art work. Find out more about this challenge and their sponsor here.
I'm thrilled to share one of two images that I won for commenting during a recent blog hop through the Crafts and Me design team blogs. This fabulous Forest Friend image is a Sara Burrier digi image made available exclusively by Crafts and Me.
This Forest Fairy seems very protective to me. It also seems as though it could be very strong and perform its fairy duties with power. I got the feeling of strength and encouragement while working with it and found this Inkadinkado sentiment appropriate. Its unusual wings have a more foliage kind of look to them. This photo shows a close up view of my Copic filled Forest Fairy image . . .
In order to fit the image onto my matting, I had to cut around parts of the wings. While cutting I altered them slightly allowing more room for coloring in places. Using a black Copic Multiliner BS around the paper core edges of the cut out wings makes them appear more complete.
I used a Fiskars read between the vines border punch with super shimmering Paper Temptress mica/metallic Juniper Berry for my card base. Paper Temptress' Cappacino/Grape Sorbet, Olive/Brown Bag and Amber mica/metallic provide additional matting for my image.
EK Success' medium and small daisy punches with a Punch Bunch mini flower and sun provide coordinating paper punched flowers. McGill's pine branch punches painted with Diamond Stickles provide nice filler between the flowers. I added a drop of Golden Rod Stickles to the center of each flower. A few Marvy 1" and 3/4" circle punches provide a base for the flowers. This photo shows a close up of just my handmade, coordinated paper flowers using punches and Paper Temptress papers.
Here's a pic of the completed card front and my entry for the current Crafts and Me punch art challenge.
I enjoyed working with this fabulous Sara Burrier Forest Friend image and look forward to using it again soon.
Copics used:
skin - E000, E01, E11, E93, BV00
hair - E31, E35, E47
clothes - E70, E74, E79
wings - BG75, BG72, BG70, Y28, Y26, Y21, E44, E42, E40, R24, R22, R20
airbrush sky - BG72
airbrush ground - E44, E43
Labels:
cards,
Copic Airbrush,
Copics,
Crafts and Me,
Handmade Flowers,
Paper Temptress,
Punch Bunch
Wednesday, June 1, 2011
Copic Creations Blogoversary Challenge: Distress It! (and a Give Away)
It’s party time!!! The team over at Copic Creations Challenges is celebrating their 2nd blogoversary! There are prizes galore provided by the wonderful sponsors of previous challenges as well as surprise packages sprinkled throughout the design team’s blogs. Please join us as we congratulate our wonderful blog host and leader Mary for a job well done, past and present design team members for their magnificent inspiration, and amazing participants (that’s YOU!) for spectacular challenge entries. Find out more about the challenge and sponsors here.
* * * * * see end of this post for my Give Away * * * * *
I've used the wonderful Car Classics large stamp set by Crafty Secrets as the focal point for my vintage, distressed Father's Day card. I used Copics to fill this fabulous 2-door classic car. When working on black things, I find that Toner Grays T9 and T6 give me the best shades of deep, dark blacks yet allow for reflective and highlighted areas with T0. The Copic Cool Grays provide the bluish tone needed for silver and metal things like the chrome on parts of this car. Here's a closeup of the filled image . . .
I added a layer of Graphic 45's A Proper Gentleman Collection Dressed to the Nines patterned paper over the Bazzill smooth navy and textured Carob Brown. I love the vintage look of Graphic 45 and its powerful ability to enhance heritage images. A few pieces of scraps from Graphic 45's Domestic Goddess Collection adorn those spots behind the torn edges.
Here's a closer look at the full card front showing wrinkled seam binding and a 7 gypsies mini key attached to the Crafty Secrets sentiment with a Tim Holtz clip and jump ring. T!m's Tiny Attacher staples hold my torn and rolled frame in place.
To complete my distressed card, I've used 13 of the 27 pieces included in this great Crafty Secrets Car Classics large stamp set. Here's a view of the smaller stamped images I added behind the Tim Holtz film strip ribbon.
Here's a closer view of the full card base including the Happy Dad's Day sentiment and ribbon strip . . .
Here's the full completed wrinkled, torn and worn, sanded and thoroughly distressed card . . .
* * * * *
I have a set of four new Copic Sketch markers to give away. E25, E27, E29, E95. If you think that these fabulous deep, dark browns will make a wonderful addition to your Copic collection, please:
1. Leave a comment on this post and tell me what made you first want to use Copic colors.
2. Help spread the word about the Copic Creations Challenge blog by adding the Copic
Creations Challenge blinkie to your blog roll. Find the blinkie here.
3. Followers of my blog get another chance to win my Give Away.
I’ll draw a random winner for my blog Give Away on June 15th and post the results here shortly afterward.
* * * * *
* * * * *
edited on 6/15/11 5:38pm to add:
And the Winner of my blog Give Away is . . .
Kate said...
That black colouring is just amazing!!
** Kate **
Congratulations Kate! Please send me a note to let me know the address of where I should send your prize package.
Thanks everyone for dropping by and participating in my blog Give Away. Come back soon! ~ Rose
* * * * *
Don’t forget to check out the Copic Creations Challenge blog design team blogs too . . . you’ll find magnificent inspiration and have a chance for winning more prizes! Leave lots of love . . .
The Simon Says Stamp! challenge blog wants to see your Father's Day with T!m Holtz entries here. They're offering a whopping $50 gift voucher for your use at their online store.
Copics used:
car body - T0, T6, T9
chrome - C1, C3, C5
windows - B000
outline shadow - B000, B0000, N1, 0
small cars - B21, B24, B28, R22, R29, R59
key tag - Y13, Y26, Y28
Subscribe to:
Comments (Atom)


