I've inked up my Times to Treasure stamps from the Lili of the Valley January 2011 release and stamped them on Bazzill Smooth White cardstock. This Times to Treasure image comes with a sentiment. I imagine that these little folks are lovingly looking through a scrapbook of their treasured moments on a beautiful and bright spring day.
This photo shows just the image filled with Copic colors:
I spent some time experimenting with making clouds on spare paper using a variety of colors: Copic marker tips directly to paper; a QuicKutz weather die cloud used as a mask for airbrushing; various ink refills pounced and rubbed; using Copic markers directly on an Alextamping's mountain skies rubberstamp spritzed with colorless blender before stamping onto paper. Here are the results of my experiments. Somehow these clouds just didn't make me happy.
Finally I used a Great Impressions Stamping in the Clouds Stencil Kit and airbrushed. Ahhh, this is what I'll try to show on my finished project.
I die cut my image with a Spellbinders Fleur De Lis Square. I used temporary adhesive to place a cut out mask over my colored image. Leaving the die in place, I began by covering the top of my image with a torn paper mask to create a horizon line. Tearing the paper allows a soft line rather than the harsh line created by a straight edge mask. Within seconds, my airbrushed ground was complete.
I replaced the torn paper mask covering the top of my die cut colored image with the matching bottom half of the mask. Using the lightest color first, I began airbrushing around the sporadically placed acrylic cloud mask. I started from the top of my image and moved the cloud mask closer to the ground as I moved along.
Here's how the clouds look with just the lightest color. Soft and subtle.
I just couldn't leave well enough alone! LOL!!! This step would have likely filled my needs for a nice, soft cloudy background. But nooo . . . I needed to brighten it up a bit more. So I used a brighter blue and went through the same steps again. Here's what happened . . .
I think I've overdone it! Now I have some areas that need to be covered. That's what flowers are for, right? I may need a bouquet - LOL!!! Here's how my die cut, color-filled and airbrushed background image looks now.
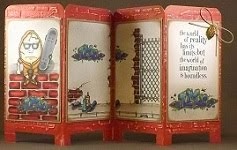
I formed an easel card out of Bazzill dark teal and pine green cardstock, Bo Bunny a gift of love Mama-Razzi stripe and aperture. Punch Bunch elongated leaves, mini sun and stamen, combined with McGill branch and EK Success paper shaper punches in daisy, small daisy and snowflake made it easy for me to use coordinating Copic colors in my attempt to create some handmade paper lily flowers.
 |
| Paper Lilies as inspired by Susan Tierney Cockburn |
This photo shows the completed easel card and my attempts at making clouds . . .
You have until May 14th to show us how you make your favorite Copic clouds. We'd love to see 'em!
I'm entering this card into the Lili of the Valley "Love Is In The Air" Challenge. Find out more about their challenge here.
"Top 3" Designer May 5, 2011 Lili of the Valley
Copics used:
skin - E000, E01, E11, E93, BV00
hair, bench - E31, E35, E47
shoes girl - T0, T6, T8
shoes boy - E30, E33, E37
hat - RV23, RV14, RV19
shirt boy - G82, G85, G99
book - E41, E43, BG70, BG75, BG78
airbrush ground - G82, G85
airbrush clouds - B91, B14
paper lilies - RV23, RV14, RV19, G82, G85












14 comments:
Such wonderful card! It's totally smashing! Love your flowers too, but it's your colouring that is really WOW! :)
Love n hugs
Marie
wow this is sensational card.
This is a fabulous card and your clouds are perfect!
Hi Rose! Your card is stunning! I LOVE your airbrushed clouds. Thank you so much for sharing your cloud experiments with us. Lots of different results and each one could be useful on different types of projects. No need for a decoy bouquet on this card! It's perfect :) Hugz, Cheryl
What a work of art!! WOW!!!! Thank you for the inspiration - you're amazing!
I don't have an airbrush system, but I will see what I can do...
Hi Rose, I'm still here, hopefully all my Google problems have gone for good!!!
Your card is stunning, such a wonderful design and colours!! Your image and clouds are perfection and your flowers so beautiful.
I ended up adding more embellishments to cover up a few 'sins'!!
hugs
Heather xx
A stunning card. I just love your colouring and a great tutorial. Thanks for taking part in this weeks LOTV Challenge
Clairex
Personally, I think you did an awesome job! And thanks for sharing the ones you didn't like. Reminds me I can practice and not try always force things to work... :D
Loevely card, such a nice background, very pretty!
Bye Mascha
Your card is amazing, Rose. I love to see how you "play", and it turned out awesome. I definitely need to get my airbrush out and get used to it. I just love to see how beautifully you work those Copics. Hugs,
Wow! This is fabulous, you've done a great job colouring this cute stamp! Congrats on "Top 3" from LOTV! Hugs, Becca
Wow, this is fabulous, Rose! Love your clouds and the beautifully colored image and those handmade flowers look awesome too!
Great work!
Hugz, Iulia
Oh Rosie..... what can I say - this takes my breath away. You did such a fabulous job on the entire card. I much get to work practicing clouds. You always inspire me!
Hugs,
Marie
What a striking card! I love "strong" colours, not bright but what I call stand alone, lol. The colouring of your image is fab, and those flowers are great too. Nice die too - the list goes on, doesn't it?! TFS and for the mini tutorial, Dee
Post a Comment