Why Rosie's Book?

While growing up, I had a dear friend, Renee, that lived next door and with whom I spent much of my childhood. We grew, in different directions, and went on our merry way. Many years later, I ran into her parents and they kindly reminded me of the laughs they still have over my book. “What book?” I wondered with a puzzled look. "I don't remember a book." Hardy laughter accompanied their response. At some time during our childhood, I tried to convince Renee about something that her parents didn’t agree with. I told her that proof of its truth could be found “in my book.” Naturally she went home and tried to convince her parents of the same thing but they weren’t falling for it. She needed an edge and told them emphatically, “It’s in Rosie’s book!” After they caught their breaths from reborn laughter, they let me know how “Rosie’s book” has been cited for many other things throughout the years. They’ve also mentioned that they’d like to see “Rosie’s book” one day. I can’t remember all of the things that I said were in “my book” but I’m sure my dear friend’s parents can recall much more than I ever knew about – LOL!!! So, here it is . . . my version of things you might find In Rosie’s Book . . .

Tuesday, December 31, 2013

My 2013 Blog Year In Review

I spent some time reviewing my 2013 blog posts and sadly my blogging shows that my health has been poorly this year.  Unfortunately I was not able to meet many of my design team commitments.  I'm grateful to the design teams of Crafts and Me Stamps, the Digi Bells of Elisabeth Bell's Designs and the lovely ladybugs of Ladybug Crafts Ink who have been patient with me while I recover as they have allowed me to continue to participate on their teams whenever I can.  I am on the mend and expect to show more projects in 2014 as I enjoy being part of introducing more of their amazing images.

I began the year as a more-experienced blogger. I continue to be inspired by you uber-talented artists who show work that I've come to know and love.  Some of my favorite 2013 occasions and projects are included below.  Basic card art rocks and fancy folds and other projects are especially fun and exciting to see!  I still enjoy my classically-shabby style - LOL!!!

There are five individual cards shown below so I enter this post in Debby's My Favourite Five of 2013 for a chance to win her fabulous favorite things candy.  (You can click on each pic to link to the posts for more details.)

Enter until Jan. 11, 2014

In January, I enjoyed rockin' in the New Year with KennyK's ElenaK . . .

http://inrosiesbook.blogspot.com/2013/01/card-art-with-copics-kenny-ks-elenak.html


February shows my use of the lovely Martini Nikki and several of my coordinating handmade flowers that I really love to make . . .

http://inrosiesbook.blogspot.com/2013/02/card-art-with-copics-ladybug-crafts-ink.html


In March I was officially crowned as a Ladybug with a beautiful tiara - LOL!!!  This tag using Queen of Hearts seemed appropriate to celebrate.

http://inrosiesbook.blogspot.com/2013/03/tag-art-with-crafts-and-me-stamps-queen.html


I had way too much fun adding stamped seasonal scenery through the window of Window Seat Billie and paper-piecing drapes to coordinate . . . (winter, spring, summer, fall)


In May, I played around with Photoshop until I learned how to merge digital images.  This example shows Geraldine in Paris . . .

http://inrosiesbook.blogspot.com/2013/05/card-art-with-copics-crafts-and-me.html


I struggled through the Summer but was able to begin Christmas-time cards using this 'Twas the Night Before Christmas image . . .

http://inrosiesbook.blogspot.com/2013/07/elisabeth-bells-world-challenge.html


I was honored to accept a guest design team spot at Sweet Stampin' for the month of September then sadly I was unable to meet their needs for my final week.  I did however add my first "no lines technique" on a scenic side-step card . . .

http://inrosiesbook.blogspot.com/2013/09/elisabeth-bells-apple-berry-digi-bells.html


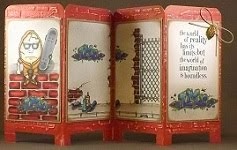
When MiC and LMM hosted their first Graffiti Party, I couldn't wait to challenge myself by using their urban images and created my first screen card . . .

http://inrosiesbook.blogspot.com/2013/10/mic-and-lmm-freebie-challenge-graffiti.html


Finally in December, I got inky and messy and had a ton of fun working on this alcohol-inked, stamped, ornament-window tag . . .

http://inrosiesbook.blogspot.com/2013/12/tag-art-with-alcohol-inks-and-die-cuts.html


While I've been unwell, unmotivated and less than creative, it's been another wonderful year in papercrafting and blogging.

I am ever grateful for your kind words, encouragement and inspiration throughout 2013.

Here's wishing you a happy and healthy New Year that's overflowing with all good things!


As always, I'm so glad that you stopped by to visit!

~ Rose

Monday, December 16, 2013

Tag Art with Alcohol Inks and Die Cuts

Ellen Hutson has hosted her annual 12 Tags of Christmas with a Feminine Twist.  Is this really the fifth year?!?!  Ellen and her designers have shown step by step guides for some really fun and gorgeous tags.  It's always a pleasure to see how Ellen's talented team inspires and this year they've shown more fabulous work.  Ellen has offered amazing prizes for each day's commenters with a whopper of a prize for showing how you've been inspired by entering one or more of your own makes.

I've played, got inky, brought out some products that I haven't used for a while and I have a few backgrounds ready for embellishing.

Here's my tag as inspired by Day 12 by Ellen Hutson . . . This tag has an alcohol inked monoprint background, an ornament die cut window, stamped and die cut branches and it was a ton of fun to see it come together.

I put a few dots of Denim, Stream, Stonewashed, Meadow and Lettuce Alcohol Inks onto my non-stick craft sheet.  A few dots of Pearl Mixative seemed like a lovely addition.  I used Sizzix' Bigz Tags and Bookplates die cut to shape my glossy cardstock then swiped that tag through my alcohol ink layers.  Alcohol Ink dries sooo fast that I kept swiping until there was no white showing through my tag.

My small original green Sizzix ornament die was the perfect size to fit my tag and so I die cut a window from my monoprint tag.

I dug out my Stampers Anonymous Letter to Santa and Mini Holidays stamp sets and began stamping the branches along the edges using archival inks in Versafine Toffee, Ancient Page Pine and Archival Ink Library Green.

A few die cut pine branches from Sizzix' Tattered Pinecone die were colored with the same archival inks as the stamped branches.  Small amounts of Claudine Hellmuth's Studio Gesso were painted along some of the branches.

The Christmas Greeting sentiment added at the bottom of my tag was included in a free stamp set with October 2013's Cardmaking and Papercraft magazine.

I adhered a QuicKutz ric-rac die to my non-stick craft sheet then swiped Mountain Rose and Copper Acrylic Paint over it.  I removed my die cuts before that paint started to dry around them.  Once that paint dried, I layed a piece of packing tape over it, using my bone folder to adhere it well.  As I pulled the tape up, the dried paint stuck to my packing tape!  Where my ric-rac die cut left empty space, I filled it with white Perfect Pearls.  I tried to adhere a 1/8" strip of wonder tape between the ric-rac but had some trouble with that.  Where possible, I tried to make a line of sparkle using Sparkle N Sprinkle's Golden Silver glitter.  More Golden Silver glitter filled the top of the ornament for additional sparkle.  That colored tape adhered to the back of my tag and filled my ornament window nicely.

Finally a Sizzix star reinforcement holds some Adornments' blue/green ribbons and fibers.  The sparkling gold ribbon accents the gold from my ornament.


Take a look over at the CLASSroom and be inspired to get inky and experiment while you create your own Christmas tags . . .


I'm entering this tag into the following challenges:
Ellen Hutson's the CLASSroom "12 Tags of Christmas with a Feminine Twist" (here)
Craft Your Passion "Christmas ABC - Anything But a Card" (here)
Simon Says Stamp and Show "Stamp Out" (here)
Divas by Design "Anything Goes" (here)
Cute Card Thursday "Christmas Catch Up!" (here)
Paper Crafting Journey "It's Christmas Time" (here)
Sweet Stampin' "Last Minute Christmas" (here)
Dream Valley "Christmas" (here)
Through the Purple Haze "Here Comes Christmas Day" (here)
Crafting with Dragonflies "Christmas Tags" (here)


"Top 3" Jan. 15, 2014 Crafting with Dragonflies

Ina of Crafting with Dragonflies chose the top 3 and said, "19 -Rose C - Love all the colours and elements here with the mixed media."


As always, I'm so glad that you stopped by to visit!

~ Rose

Saturday, December 14, 2013

Card Art with Copics: KennyK's Jet Setter

With the holidays on their way, many travelers are making arrangements so they can share special times with their families and friends.  With that in mind, I've opted to use KennyK's Jet Setter, complete with luggage, to share loving thoughts with my dear daughter who sadly won't be able to join us this year for our holiday celebrations.

Here's a closer view of my Copic-filled image.  I've painted a light coating of Walnut Stain Distress Stickles over her coat to add some sparkling texture.


I layered Bo Bunny's A Gift of Love "Believe Peace" over black cardstock then used Memory Box' Grand Heart to create my double gatefold card with a heart window.

This view shows my card when fully opened so the heart windows show on each side . . . I've added an Inkadinkado Warm Holiday Wishes clear stamp then tried to fill the stars with the brush tip of a Wink of Stella clear pen.  I'm unhappy with the uncontrollable blobs of sparkle that fell over my stars.


Prima's Tea Roses Sweet Teal and Heirloom Paper Leaves Willow are clustered with a Basic Grey's Fabric Yo Yos button flower and cotton flower with Michael's Celebrate It Sparkling 3/8" ribbon, Morex Corp's white 1/4" Organdy ribbon and Petite Stitch 1/8" ribbon to embellish the lower right of the front of my card.


This scanned view shows how the card front looks when the sides are closed and overlap . . .


I'm entering this card into the following challenges:
KennyK's Krafty Krew "Button, Boots and Bling" (here)
Divas by Design "Anything Goes" (here)
Cute Card Thursday "Christmas Catch Up" (here)
Paper Crafting Journey "It's Christmas Time" (here)
Crafty Catz "Anything Goes" (here)
Sweet Stampin' "Last Minute Christmas" (here)
Crafty Ribbons "Anything Goes with Ribbon" (here)
Totally Gorjuss "Special Christmas" (here)
Southern Girls "Christmas-themed Projects" (here)


Copics used:
skin - E000, E01, E11, E93, BV00
hair, suitcase - E31, E35, E47
sweater, stickers - RV63, RV66, RV69
pants, stickers - BG70, BG72, BG75, BG78
suitcase - YG21, YG23, YG25
boots, wheel - T0, T6, T9
suitcase hardware - C1, C3, C5
grounding shadow - W5, W3, W1
airbrushed background - B72, speckles BG78, R89


As always, I'm so glad that you stopped by to visit!

~ Rose

Sunday, October 27, 2013

Elisabeth Bell's World Challenge: Witches

The Digi Bells design team over at the Elisabeth Bell's World Challenge Blog wants to see your Witches.  A very lucky randomly selected entry will win TWO Elisabeth Bell digi images of their choice AND an exclusive stamp from Whiff of Joy!  You can find out more about this challenge and sponsors here.

Here's a closer view of my Copic-filled image with a few highlights added with a Sakura Gelly Roll medium White marker . . .


Layers of Bazzill Raven black and Green Bling with patterned sheets from Little Yellow Bicycle's (LYB) Frightful 8x8 tablet form my side-open card.  A Spellbinders Scalloped Circle die cut of black netting lies behind the Lifestyle Crafts Large Circle shaped image.  An EK Success Whale of a Punch Photo Corner Scallop of Doodlebug Design's black sugar paper is popped up in an upper corner.

A journaling frame from the LYB Frightful tablet, matted with black glossy paper, holds a black paper covered chipboard bat from a Sizzix Tim Holtz Alterations "Bewitching Hour" die.  A few handmade flowers made from a Punch Bunch small blossom and birch leaf with a pearl center are lightly painted with Star Dust Stickles to add sparkle to the other upper corner.


A "bewitching" bracket from the LYB Frightful tablet lies beneath a bow made from Michaels' 3/8" Celebrate It black metallic ribbon and another handmade flower from a Cheery Lynn Build-a-Flower #1 die set with Punch Bunch extra large birch and medium oak leaves painted with Star Dust Stickles for wonderful glimmer.  A couple of QuicKutz digital image pumpkin vines, cut by my Silhouette electronic cutter are spritzed with Tattered Angels Creme de Chocolat Glimmer Mist to add a swirling border.


Here's a view of my completed card front showing my use of Elisabeth Bell's Little Witch with a Broom clear stamp image . . . There's amazing sparkle, shimmer and glimmer all over this card - it's a shame that I couldn't capture it in the photos.


Here's a view of the inside of my card . . .


You can find more inspiration using Elisabeth Bell's digital images at the Digi Bells Design Team blog here and many rubberstamp and clear stamp images at the Elisabeth Bell's World challenge blog here.


I'm entering this card into the following challenges:
Bunny Zoe's Crafts "Ribbon" (here)
Simon Says Stamp and Show "Spooky" (here)
Simon Says Stamp "Halloween or Halloween Colors" (here)
Crafty Creations "Halloween Characters" (here)
Divas by Design "Spooked" (here)
Cute Card Thursday "Spooktacular" (here)
Paper Crafting Journey "Anything Goes" (here)
Southern Girls "Shine On" (here)
Stampin' For the Weekend "Something Spooky" (here)
Fashionable Stamping "Make a Card" (here)

Copics used:
skin - E000, E01, E11, E93, BV00
hair - E31, E35, E47
broom handle, pumpkin stems - E31, E35, E37
broom bristles - Y21, Y26, Y28 + atyou Spica Gold
pumpkins, clothing trim - E02, E04, E09
hat, cloak - V20, V22, V25, V28
clothing trim - G40, G43, G46
spider, web - atyou Spica Silver
airbrushed background - Y21


As always, I'm so glad that you stopped by to visit!

~ Rose

Sunday, October 20, 2013

MiC and LMM Freebie Challenge - Graffiti Party

Make It Crafty and Little Miss Muffet Stamps are hosting a Graffiti Party and provided this amazing free MiC and LMM artwork to those who want to participate.

I was so inspired by Lynne K's screen card (here), that I decided to use these fun Little Miss Muffet and Make It Crafty Graffiti Party images on my own screen card:


This was my first attempt at making a screen card.  DCWV white core cardstock allowed for a bit of detail to show when sanded.  Zutter's 1/2" Round-it-All corner rounder softened my tops.  The base of the large tag from a Sizzix Traditional Combo Tags die cut through all four panels to square off the bottoms.  I lost a leg or two while running the panels through the die cut machine to emboss with Sizzix Tim Holtz Alterations Bricked Texture Fade then lightly sanded the raised bricks.  A golden leaf charm hangs from a jump ring on a hemp bow. A Sakura Gelly Roll medium white pen adds some sharp highlights to my eyeglasses and graffiti letters.  A Stampers Anonymous Tim Holtz Collection Stuff to Say sentiment fits nicely on the last panel.

Other than my loss of legs, I like the embossed look of the background.  I need to work on reinforcing and strengthening the legs to be able to hold the weight of my images and heavier embellishments on future screen cards.  They do make nice displays for scenery.


Individual panels . . .


Humpty Dumpty in Da Hood


Part1 of MiC's Urban Scene


Part2 of MiC's Urban Scene


LMM Graffiti word

You've got to pop over to the Make It Crafty and Little Miss Muffet Stamps Graffiti Party blog and see the amazing artwork using the MiC and LMM images entered there!


I'm adding this screen card to the following challenges:
Craft Your Passion "Embossing" (here)
Creative Craft "Anything Goes and Blogaversary" (here)

Copics used:
brick wall - E71, R46, R59, E79, R20
gate, eyeglass lenses - C1, C3, C5
egg - E41, E43, 0
tires, eyeglass frames - T0, T6, T9
hoodie outfit, sneakers - E57, E51
sidewalk, curb, between bricks - W3, W1
top of wall - C3, C1
graffiti and paint cans - FV2, FB2, FBG2, FYR1, FYG2, V22, B23, BG23, Y23, C6
airbrushed cement wall - W3
airbrushed speckles - N6


http://graffitiparty.blogspot.com.au/2013/11/graffiti-party-winners.html

Many thanks to Zoe and Barbara . . . I won the Graffiti Collection from LMMS & the Urban Characters from MiC!   These extremely talented artists liked my screen card for use of their images and THAT means alot to me!!!
 
 
As always, I'm so glad that you stopped by to visit!

~ Rose

Friday, October 18, 2013

Elisabeth Bell's Li'l Witch on the Moon Digi Bells' Blog Hop

To celebrate the newest addition to the Elisabeth Bell Design's Digital Gallery (here), the Digi Bells Design Team is hosting a blog hop.

How can you win your own Li'l Witch on the Moon digi image? You'll have to hop through and leave comments on EACH blog. [You can find the full list of 11 other blogs at the Digi Bells Design Team blog (here).] Lynda will pick 2 blogs at random and the winners will be picked from those comments. The hoppers will have until Friday, October 25, 2013 at 9 AM to leave comments. The winners will be posted at the Digi Bells' blog on Saturday, October 26, 2013.

Reminder: Buying then sharing digital images is theft. Sharing digital images takes income away from the artist.


* * * * *

I've used this sweet little witch on a side-open card.  Here's a closer view of my Copic-filled image with Golden Rod Stickles painted over the moon and Star Dust Stickles over the ghosts.  My image is shaped using Lifestyle Crafts large circles dies.


A bit of We R Memory Keepers Black Widow paper pack patterned paper is layered with Bazzill cardstock in black, sage and rust.  A 15/16" sheer gold metallic ribbon and black pointed cotton lace forms a border to ground my image.  An iridescent orange/black sheer ribbon bow is my only embellishment.


Here's how the inside looks . . .


Remember to leave your comment below then move along to your final stop at the Digi Bells Design Team blog (here).  For reference, you can find the full list of the blogs to hop at the Digi Bells Design Team blog (here).


I'm entering this card into the following challenges:
Creative Card Crew "Sun, Moon and Stars" (here) - Moon and Stars
Bunny Zoe's Crafts "Ribbon" (here)
Crafty Creations "Sparkle and Shine" (here)
A&T Digi Des/Emerald Faeries "Sparkle" (here)
Delicious Doodles "Non-Scary Halloween" (here)
Creative Craft "Anything Goes" (here)
Divas by Design "Autumn Colors" (here)
Creative Inspirations "Autumn/Fall Colours!" (here)
Papertake Weekly "Happy Halloween Hues" (here)
Crafty Ribbons "Anything Goes with Ribbon" (here)


Copics used:
skin - E000, E01, E11, E93, BV00
hair - E31, E35, E47
broom handle - E31, E35, E37
broom bristles - Y21, Y26, Y28
stars, dress, hat - YG91, YG93, YG95
hat band, patches - E02, E04, E09
(moon - painted with Golden Rod Stickles; ghosts - painted with Star Dust Stickles)


As always, I'm so glad that you stopped by to visit!

~ Rose

Tuesday, October 15, 2013

Ladybug Crafts Ink Challenge and New Release: Skinny Malinkys

The current challenge by the Lovely Ladybugs over at the Ladybug Crafts Ink TLT Challenge is Anything Goes. Hop over to enter your project for a chance to win a special LCI prize (and an extra special prize if you use a Ladybug Crafts image!). You can find out more about this challenge and the wonderfully talented Ladybugs here.

Today is a very big Ladybug Crafts Ink event as we're sharing half of the new release of Skinny Malinky images!  To celebrate the newest additions to the fabulous Ladybug Crafts Ink digital collection (here), the Lovely Ladybugs are hosting a "blog not-a-hop." - LOL!!!  (Kerry stated that it is NOT a hop but you have to hop to collect the letters; so, with all due respect to Head Ladybug Kerry, I'm calling it a "blog not-a-hop.")

How can you win all 12 of your own Skinny Malinky  digital images?  You'll have to visit EACH blog, note the bloggers' assigned letter(s), put the word(s) together and email your response to Head Ladybug Kerry at lcichallengeblog@aol.com. [You can find the 11 other blogs at the Ladybug Crafts Ink Challenge blog (here)].

You've got to hop over to the challenge blog to see how the Lovely Ladybugs have shown their use of several of the newly released images!

* * * * *

I've had the pleasure of working with Etta to create a softly embellished gift bag.

This view shows my Copic-filled ''no lines" image and a closer view of my Stamps by Judith stamped sentiment . . .


I've layered pieces of Anna Griffin's ornament patterned paper with cardstock to cover the pre-printed store info and recycle a gift bag that my niece gave to me last year.  Fuzzy and hemp twisted trim adds a border at the top and bottom.  A huge Prima Lollipop Candies flower with a jewel in the center is my only other embellishment.

Here's a view of the completed front of my recycled gift bag showcasing Ladybug Crafts Ink Etta . . . with such a neutral background, Etta in brights stands out very well.


If you like to not-a-hop in order then move along to your next stop at the wonderfully-talented Sally's blog (here).  You can find the 11 other blogs with the design teams' fabulous creations at the Ladybug Crafts Ink Challenge blog (here)].

Oh yeah, my letter is L.


I'm entering this gift bag into the following challenges:
Cute Card Thursday "Neutral Zone" (here)
Winter Wonderland "Wrap It Up" (here)
Stampin' For the Weekend "Anything Goes" (here)
Bunny Zoe's Crafts "Ribbon" (here)
Creative Craft "Anything Goes" (here)

* * * * *

Copics used:
skin - E000, E01, E11, E93, BV00
hair - E31, E35, E47
tires, seat, foot runner - T0, T6, T9
chrome parts - C1, C3, C5
pants, jacket, boots - E51, E55, E59
helmet, scarf, gloves, bags - RV23, RV14, RV19
scooter, bags - BG11, BG15, BG18
bags, headlight - Y32, Y35, Y38
bags - R21, R24, R29
bags - B21, B24, B28
background faux suede - N4, W2


As always, I'm so glad that you stopped by to visit!

~ Rose

Friday, October 4, 2013

Crafts and Me Stamps Challenge: Use a Hannah Lynn Image

The design team over at the Crafts and Me Stamps' challenge blog wants to see how you use Hannah Lynn images on your projects.  Hannah Lynn is sponsoring this challenge and a randomly selected entry will receive a wonderful signed 8x10 inch matte photo print direct from Hannah herself! You can find out more about this challenge and sponsor here.

I've used the newly released digital image named Payton by Hannah Lynn on a double gatefold card with a window.  Here's a closer view of my Copic-filled image.


Bazzill's light blue and green cardstock is layered with Imaginisce double-sided balloon/spots patterned paper to create my card.  My image is shaped to be seen through a window formed using a Lifestyle Crafts Large Circles die set.  A 5/8" Satin Sensations Island Blue ribbon bow provides an element to hang a vintage "sweet thing" charm from a Tim Holtz idea-ology Trinket Pin.
 
Here's a view of the front of my card when closed showing how I've used the Payton digital mermaid image . . .


This view shows my double gatefold card with windows on each side as it stands open and ready for display.


You've got to hop over to the Crafts and Me Stamps Challenge blog to see how the amazingly talented Design Team has shown their use of Crafts and Me Stamps Hannah Lynn images.


I'm entering this card into the following challenges:
Craft Your Passion "Add a Little Charm" (here)
Ooh La La Creations "F is for ____?" (here) - fancy folds, fantasy, fun, face, fin
Bunny Zoe's Crafts "Something Blue" (here)
Crafty Sentiments "Favorite Technique or Colors" (here) - Fancy Folds, Brights
Simon Says Stamp! "Going Dotty" (here) - Dots throughout background paper and on clothing
Fab 'n Funky "Ribbon" (here)
Moving Along with the Times "Anything Goes" (here)
Creative Craft "Anything Goes" (here)
Crafty Ribbons "Anything Goes with Ribbon" (here)
Crafty Catz "Anything Goes" (here)


Copics used:
skin - E000, E01, E11, E93, BV00
hair - E31, E35, E47
headband, top, fin - B21, B24, B26
leaves, tail, fin - G02, G05, G09
faux suede background - BG53


As always, I'm so glad that you stopped by to visit!

~ Rose

Friday, September 27, 2013

Elisabeth Bell's Apple Berry Digi Bells' Blog Hop

To celebrate the newest addition to the Elisabeth Bell Design's Digital Gallery (here), the Digi Bells Design Team is hosting a blog hop.

How can you win your own Apple Berry digi image? You'll have to hop through and leave comments on EACH blog. [You can find the full list of 10 other blogs at the Digi Bells Design Team blog (here).] Lynda will pick 2 blogs at random and the winners will be picked from those comments. The hoppers will have until Friday, October 4, 2013 at 9 AM to leave comments. The winners will be posted at the Digi Bells' blog on Saturday, October 5, 2013.

Reminder: Buying then sharing digital images is theft. Sharing digital images takes income away from the artist.


* * * * *
 
I've used the "no lines" technique (see my How To Print notes at the end of this post) on this newly released Apple Berry digital stamp by Elisabeth Bell to make a scene on a side-step card.  This view shows a closer view of my Copic-filled image after I added Glossy Accents over her pie and the apples in her basket.  I've used the Lifestyle Crafts Large Ovals set to shape my image.


Bazzill's green cardstock is layered with an old Stampin' Up! green apple patterned paper to form my card.  A bit of Creative Imaginations Thin Cherry Real Wood lies beneath my QuicKutz Santa's Workshop window frame and hand pleated apple curtains.  Through the window, you see a few QuicKutz Mini Apples, covered with Glossy Accents, hanging from the branches of a couple of QuicKutz trees from a Santa's Workshop Heritage Accessories set.  I included a layer of a white Memory Box Estate Fence die cut to make the apple trees appear further away.  A few more Glossy Accents-covered mini apples lie at the base of my image while a knotted lace ribbon adds another delicate layer in the top corner.


This view shows the layers of the scenery elements of my side-step card.


Remember to leave your comment below then move along to your next stop at the wonderfully-talented Lynne's blog (here).  For reference, you can find the full list of the blogs to hop at the Digi Bells Design Team blog (here).


I'm entering this card into the following challenges:
Simon Says Stamp! "Anything Goes" (here)
Divas by Design "Monochrome" (here)
Cute Card Thursday "Pretty Ribbons" (here)
Southern Girls "The World in Monochrome" (here)
Creative Craft "Use Ribbon" (here)
Oldie but Goodie "Dies and Punches" (here) - everything is OLD except for the digi image
Crafty Ribbons "Monochrome" (here)
Elphine House Australia "Simply Cute" (here)
Creative Inspirations "Favorite Stamp Brand" (here) - Elisabeth Bell Designs


Copics used:
skin - E000, E01, E11, E93, BV00
hair, pie, basket - E31, E35, E47
apples - YG91, YG95, YG97
leaves - YG11, YG13, YG17
hat, top, knickers, apron, mitts, floor background - E40, E41, E43, 0
ribbons atyou Spica Olive
faux suede scribbled wall background - YG91


On 9/27/13, Elisabeth Bell wrote:  "Rooossee, your card is absolutely EXQUISITE!!"

* * * * *

How to Print Prepare Digital Image for "No Lines" Technique using Photoshop Elements 8
FIRST STEP
Select File tab; Select Open then select .jpg or .png image
Select Image tab
Slide to Convert Color Profile
Select Convert to (*) Profile

SECOND STEP
Select Layer tab
Slide to New Adjustment Layer
Select Hue/Saturation
Mode:  Normal Opacity: 50
Adjustments show at right; slide Lightness to far right

Select File tab then Save As:  .jpg copy file then print image
Do NOT save changes to your original .png image or you will LOSE your digi investment!!!

Note:  You may NOT alter the line work of artist-created digital images.  These steps are simply the digital equivalent of stamping a rubberstamp image in gray ink rather than black ink.

* * * * *

As always, I'm so glad that you stopped by to visit!

~ Rose

Wednesday, September 25, 2013

Elisabeth Bell's World Challenge: Shaped Cards

The Digi Bells design team over at the Elisabeth Bell's World Challenge Blog wants to see your Shaped cards.  A very lucky randomly selected entry will win TWO Elisabeth Bell digi images of their choice AND a prize from Elphine House Australia!  You can find out more about this challenge and sponsors here.

This sweet little lady has been working hard gathering a basket full of apples for her teachers.  You can find this wonderful clear stamp image designed by Elisabeth Bell included FREE as a set of three Pretty Ladies with three additional floral hair piece stamps in the July 2013 issue of QuickCards Magazine.

Here's a closer view of my Copic-filled image, hand-shaped as an apple.  I've airbrushed my cloudy sky background using diecuts from My Favorite Things Die-namics Cloud Trio set as masks.


An older Stampin' Up! red apple patterned paper is layered with Bazzill cardstock to form my Whimsy Shape EZ Happy Apple shaped card.  Faux stitching borders my card shape.  A strip of old burlap provides a diagonal border behind my image with a Cuddly Buddly worm button from a "Mixed Garden Brights" set tied with hemp cord on one side and a gingham ribbon bow on the other.

A Marianne Design Craftables Passe-Partout Rectangle diecut is popped up to hold a Close To My Heart Seasonal Sensation set "For You" stamped sign and a Sizzix original small green Fruit die apple die cut from chipboard then coated with glossy accents.  An additional hairpiece has been popped up and covered with glossy accents to hold her pony tail.

Here's a view of my completed card front showing my use of Elisabeth Bell's Pretty Lady with apple basket clear stamp image . . .


Here's a view of the inside of my shaped card . . .


This shows a side view of my apple shaped tent card, ready for display . . .


You can find more inspiration using Elisabeth Bell's digital images at the Digi Bells Design Team blog here and many rubberstamp and clear stamp images at the Elisabeth Bell's World challenge blog here.


I'm entering this card into the following challenges:
ABC Challenge "V for Very Cute" (here)
Elphine House "Simply Cute" (here)
Stampin' for the Weekend "Back to School" (here) - Apple for Teacher
All Sorts "Button Up" (here) - worm button
Simon Says Stamp! "Anything Goes" (here)
Crafty Ribbons "Anything Goes with Ribbon" (here)
Marianne's Design Divas "Anything Goes" (here)
Sweet Stamps "Roses" (here) - Roses in her Hair
Oldie But Goodie "Dies and Punches" (here) - very old red gingham ribbon
Whimsy Stamps "Masculine Cards" (here) - For a Male Teacher from a female student


Copics used:
skin - E000, E01, E11, E93, BV00
hair, basket - E31, E35, E47
apples, roses, flowers - R20, R22, R27
blouse, grass, leaves - YG91, YG95, YG97
pants, smock, headband - B91, B95, B97
airbrushed masked cloud sky - B91, W1, W0, W00, 0


As always, I'm so glad that you stopped by to visit!

~ Rose

Saturday, September 21, 2013

Card Art with Copics: Butterfly Bliss by Teresa Sherman

I'm happy to join in this week's Sweet Stampin' "Glamour and Glitz" challenge as a guest designer.  It's an honor to be invited to submit a project to be displayed along with the Sweet Stampin' team projects.  Thanks to Tracey and the rest of the Sweet Stampin' design team for including me!  (You can find out more about this My Mum's Craft Shop AND The Ribbon Girl sponsored challenge as well as the wonderfully talented Sweet Stampin' design team here.)

I've used Butterfly Bliss, just one of Teresa Sherman's many gorgeous digi images.  She's available from Delicious Doodles here or Stitchy Bear's Digi Outlet online shop here.  I've used Copic markers to fill her skin and hair.  A variety of colors of Copic atyou Spicas add amazing sparkle to the butterflies.  Distress Stickles in Vintage Photo, Spiced Marmalade and Fired Brick fill her clothing, feathered earrings and brooch.


This photo shows my completed card front where I've used this stunning image.  Bazzill cardstock is layered with Rusty Pickle's Lizzie's Cats spotted paper and Karen Foster Design's Fall Foliage patterned paper.  A Magnolia Doohickeys Tilda Lace Die border grounds my image.  Several Zva Creative clear rhinestone swirls provide movement around my image while a green seam binding bow lies in one corner.


Pop over to the Sweet Stampin' challenge blog for wonderful design team inspiration and enter your "Glamour and Glitz" project to win some fabulous prizes.


I'm entering this card into the following challenges:
Delicious Doodles "Gems and Bling!" (here) - entered twice; added "2nd entry"
One Stitch at a Time "Autumn/Fall" (here) - (forgot to add "#" after entry)
Papertake Weekly "Make it Sparkle" (here)
Crafty Sentiments "Fall/Autumn Colors" (here)
Tuesday Throwdown "Things with Wings" (here) - butterflies
Simon Says Stamp! "Use a SSS! Product" (here) Copic Markers, atyou Spica, Distress Stickles,
          Magnolia Doohickeys Tilda Lace Die
Fab-n-Funky "Leaves" (here)
Divas by Design "Anything Goes" (here)
Wags 'n Whiskers "Sparkle" (here)
Oldie but Goodie "Dies and Punches" (here)


Copics used:
skin - E000, E01, E11, E93, BV00
hair, eyes - E31, E35, E47
background - Y23
Copic atyou Spica - olive, garnet, lemon, orange, gold, mint, sand, chocolate


As always, I'm so glad that you stopped by to visit!

~ Rose

Saturday, September 14, 2013

Card Art with Copics: Ryder Cole by KennyK

I'm thrilled to participate in this week's Sweet Stampin' "Fancy Folds" challenge as a guest designer.  I'm so lucky to be invited to submit another project to be displayed along with the Sweet Stampin' team projects.  Thanks to Tracey and the rest of the Sweet Stampin' design team for including me!  (You can find out more about this Iva Nova Chest AND The Ribbon Girl sponsored challenge and the wonderfully talented Sweet Stampin' design team here.)

Meet Ryder Cole.  He's one of the few really cool KennyK images that you can get as a digi from KennyK's online shop here or as a rubberstamp from Whimsy Stamps here.  Ryder Cole is a great image to have on hand to meet those awkward teenage boy events like birthdays, thinking of you or congrats for a great job done.


This photo shows my completed card front where I've used this great teenage boy image.  Spellbinders Labels Four (with Grands Labels Four) die cuts shape my image.  Bazzill cardstock is layered with Rusty Pickle's Lizzie's Cats spotted paper.  A border is made using McGill's single star punch and a bit of Michael's 1/8" Textured Trios striped ribbon.  A Jillibean Soup Beanstalks twine is tied in an upper corner.  A few QuicKutz Revolution Flourishes are scattered about while a single handmade flower, lightly painted with Diamond Stickles, (Punch Bunch 5-petal flower, small cosmos and birch leaf) sits in the lower right corner. 


I prepared a "Happy Fall" tag to adhere to the front (Get it?  Wishing a skateboarder a Happy Fall!?!? LOL!!!) .  I decided to hang on to the piece to use if I give the card to a young man who won't be hurt by it.  LOL!!!  Teenagers can be sooo temperamental . . . 
 
And here's the inside of my card showing Karen Foster Design's Fall Foliage patterned paper.  I left the sentiment area blank because I'm really not sure how I'll use this card at this time.


This view shows my Flip Z card, open and ready for display . . . This pic doesn't show the remaining empty space left as the image flips to the front.  This post of my Flip Z card shows the space much better (here).


Pop over to the Sweet Stampin' challenge blog for wonderful design team inspiration and enter your "Fancy Folds" project to win some fabulous prizes.


I'm entering this card into the following challenges:
One Stitch at a Time "Use a Digi" (here)
Kenny K's Krafty Krew "Colors of Fall" (here)
Whimsy Stamps Monthly "Masculine Cards" (here)
Oldie but Goodie "Spots and Stripes" (here)
Crafty Sentiments "Anything Goes" (here)
Tuesday Throwdown "Anything Goes" (here)
Crafty Catz "Men/Boys" (here)
Sketch Saturday "Sketch by Jen" (here)


Copics used:
skin - E000, E01, E11, E93, BV00
hair, collar, pants - E31, E35, E47
jacket - E13, E17, E19
hat, shirt, rag, sneakers - YG91, YG95, YG99
chain, axles - C1, C3, C5
wheels - T0, T6, T9
airbrushed background - E17, E35, YR24, YG95


As always, I'm so glad that you stopped by to visit!

~ Rose